Guest travel decides which of these cards is yours: a destination wedding calls for a card that names the place, like the boarding pass that lists Fort Myers Beach, Florida and May 2, while a local wedding can lean on a photo, a calendar or a wax seal.
Options in the list range from a QR code or digital tablet card that costs almost nothing to send to an engraved wooden plaque or acrylic piece that costs more to make and mail, so your guest count and your timeline will cut the field down fast.
A short list can handle keepsakes; a long one wants paper or a screen.
1. Photo Save the Dates
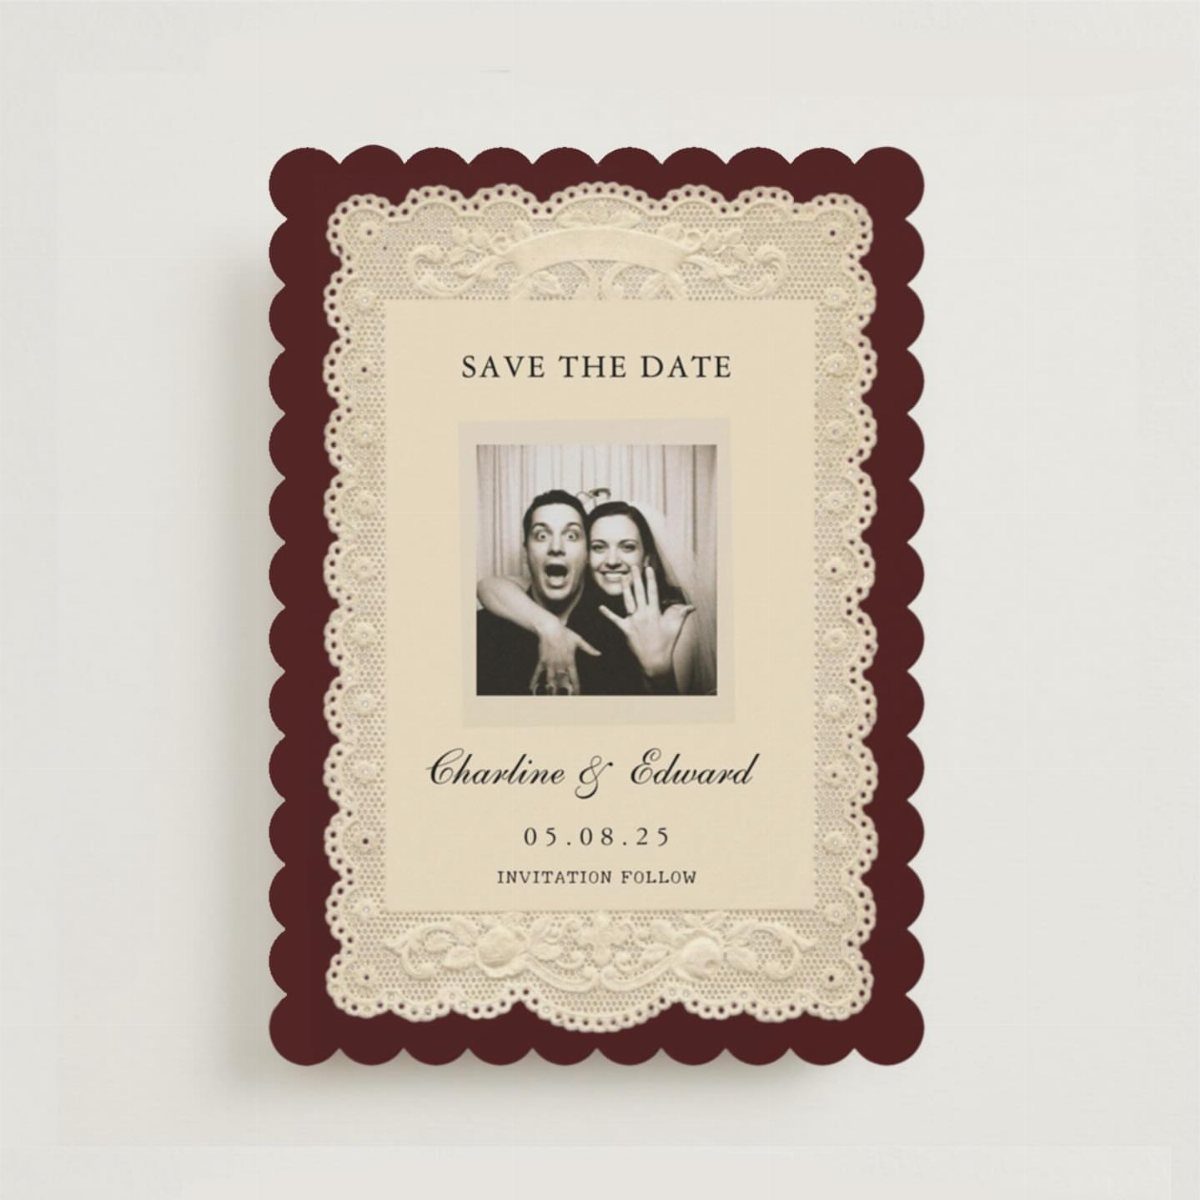
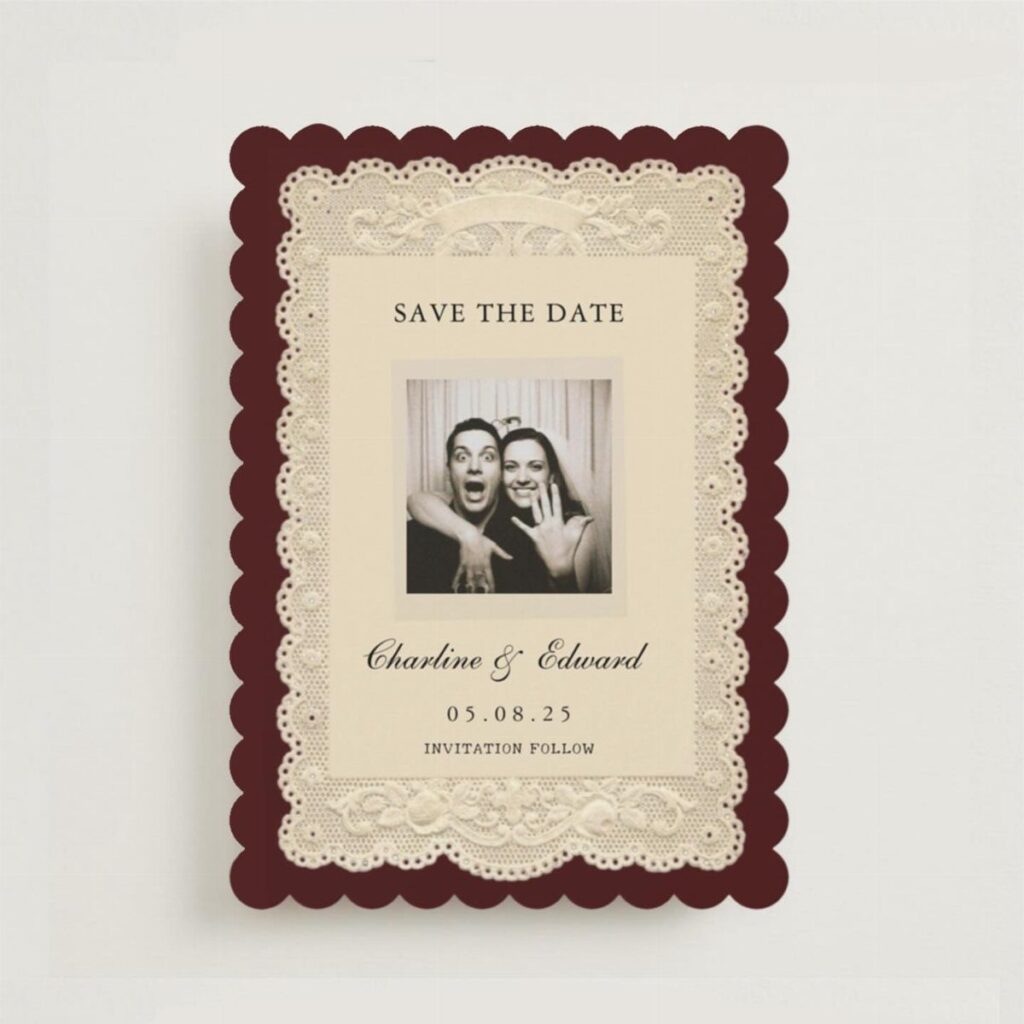
A black and white engagement photo carries the whole card, so pick one with a clear, uncluttered face and let a lace border or scalloped burgundy edge add the old-fashioned warmth.
Pick your favorite frame from the session, ideally one where both faces are clear, since guests will pin this to the fridge and look at it for months.
The card also says "Invitation to follow," a useful line that tells guests the formal invite is coming. Keep the date in a simple numeric format, as the card does, so it reads at a glance.
2. DIY Save the Dates
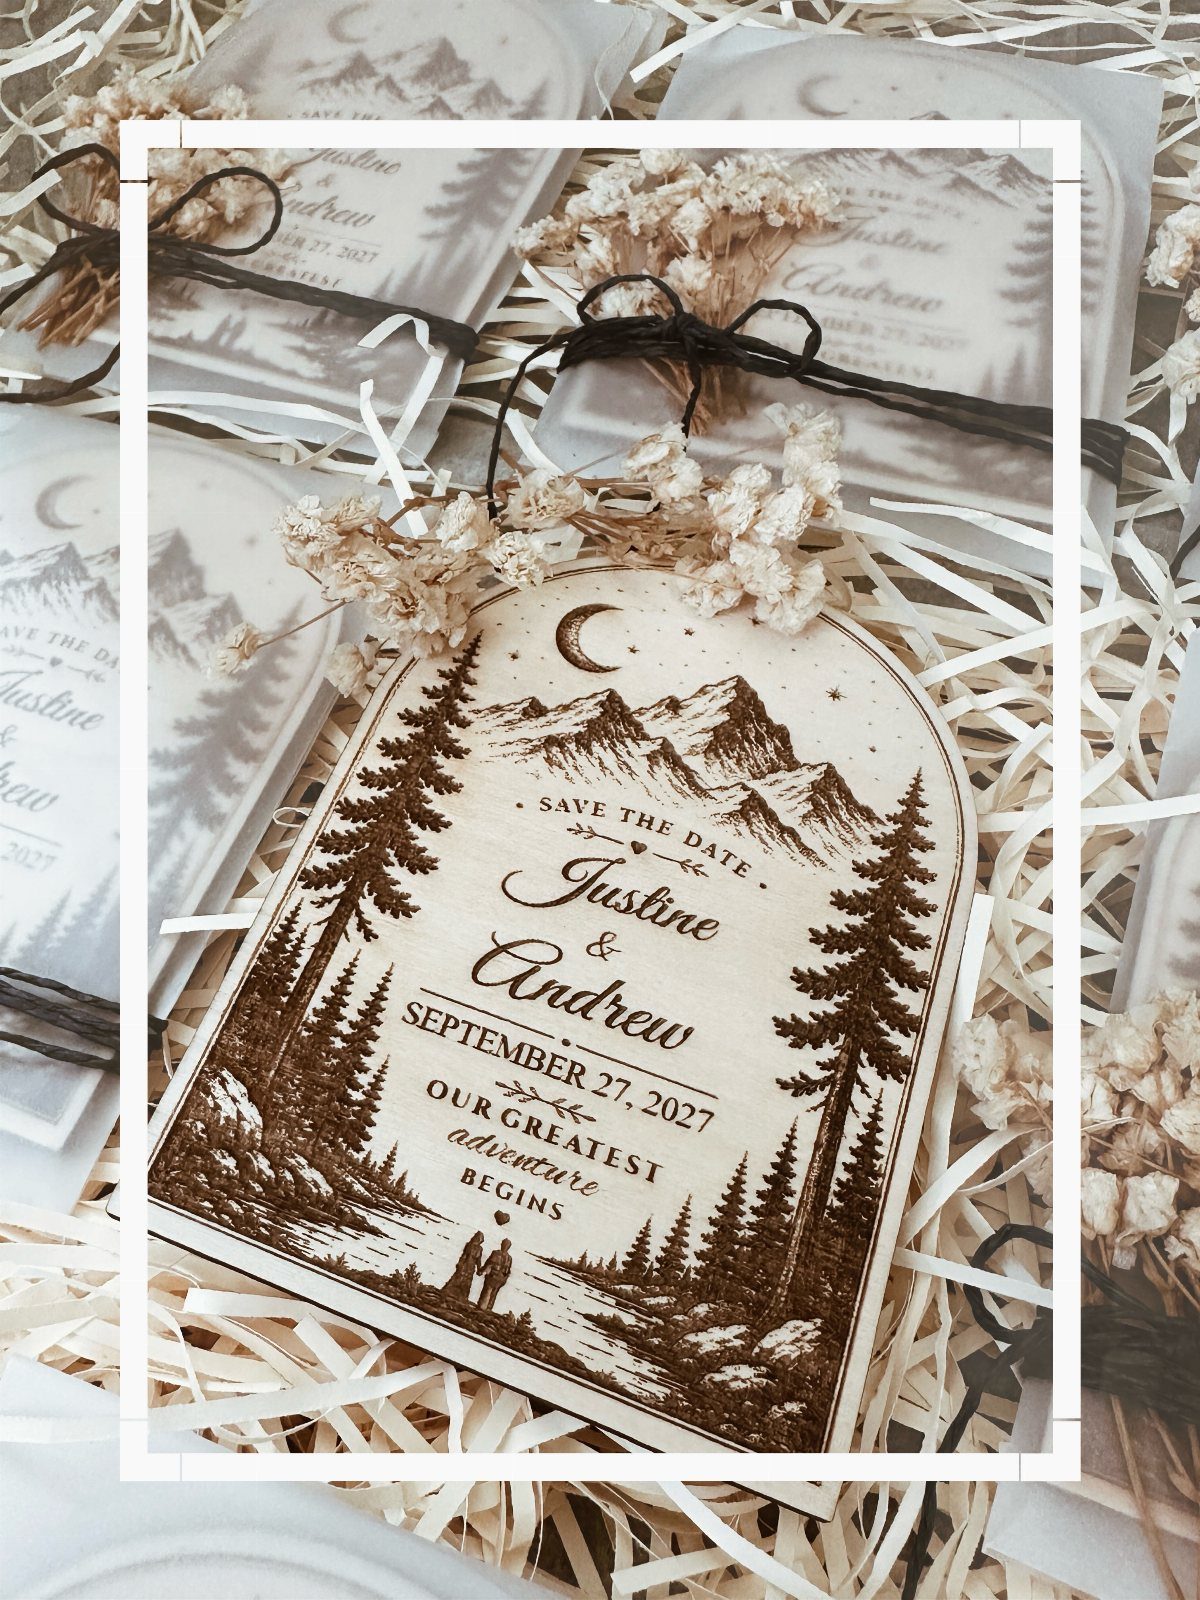
The wording matters as much as the craft: a line like "Our greatest adventure begins" tells guests the tone of the day before they read a date.
I would make a test piece first and only then commit to the full guest list. Handmade means slower, so start early and budget your evenings, not just your supplies.
3. Watercolor Map Save the Date
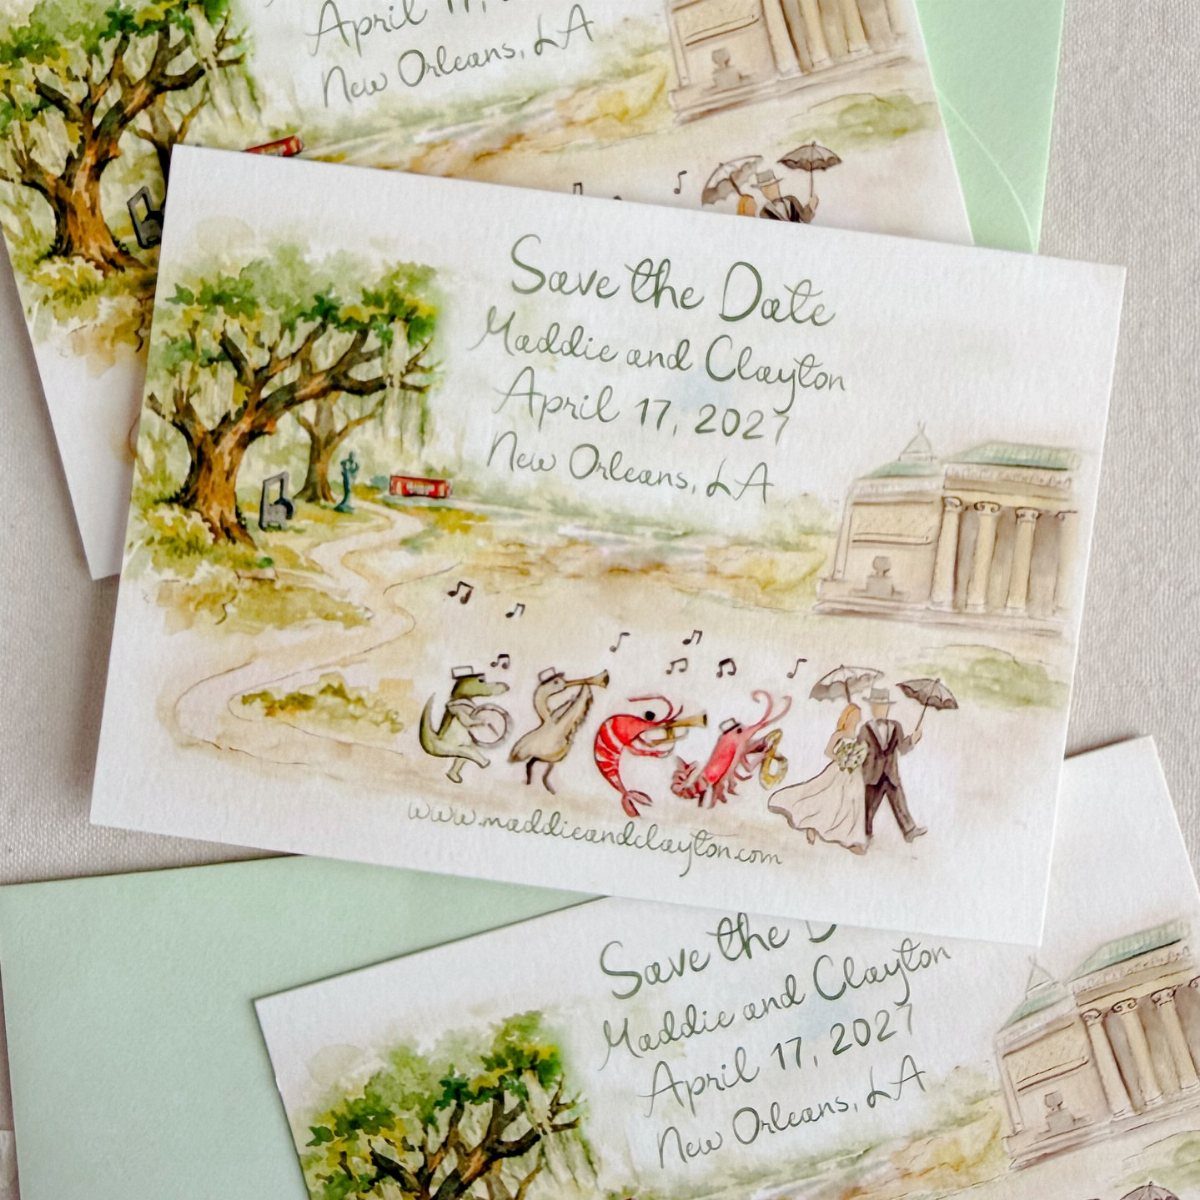
Putting your city on the card tells guests where to book travel before the formal invite arrives.
A watercolor scene of local landmarks, with a few playful touches like animals playing instruments, makes the place feel like part of the celebration.
Ask an illustrator to paint a set of related cards, as in a trio of different scenes, and mail guests one each or mix them.
A watercolor map earns its place on a destination wedding, since guests need to know where they are headed before they can book anything.
4. Custom Illustration Save the Date
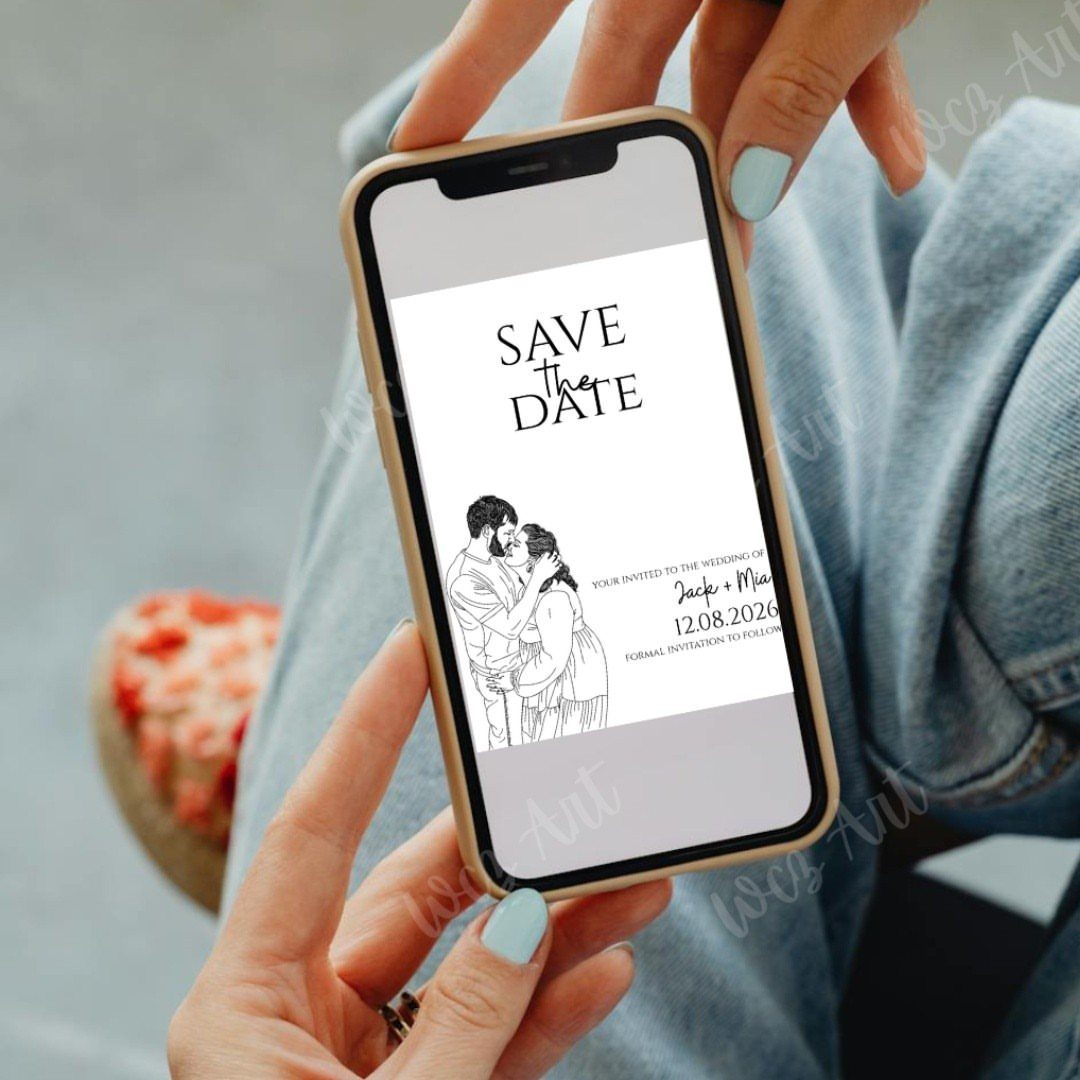
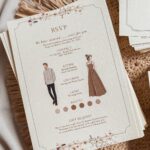
A simple line drawing of the two of you, set above your names and a numeric date, is a clean way to look personal without a photo shoot.
Because it works on a phone screen, it is also the cheapest route to guests: no printing and no postage.
Commission the artwork once and you can reuse the same drawing on the invitation, the website and the thank-you cards. I would keep the lines minimal so it stays legible when it shrinks on a small screen.
5. Botanical Save the Dates
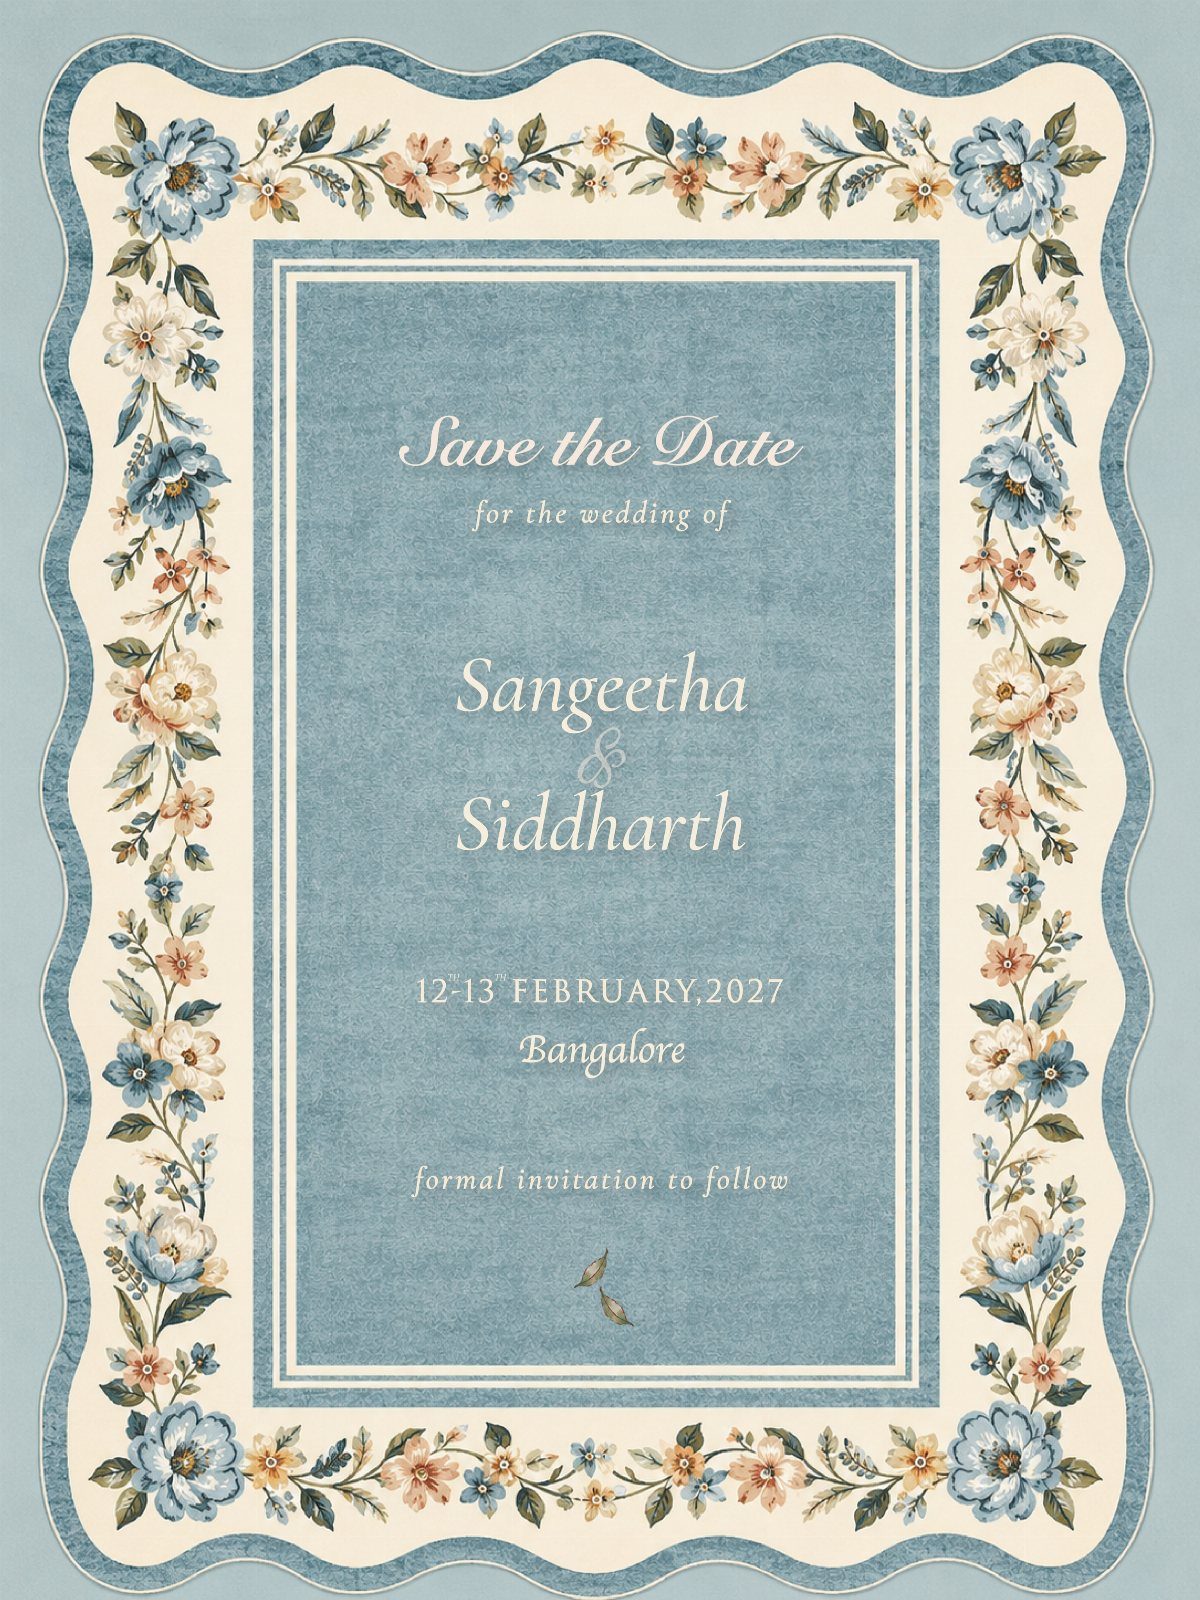
Flowers drawn around the edge of a card, here in blue and cream, bring a romantic feel without stiff formality.
A deep blue center leaves plenty of room for names and the date, and the botanical border frames it like a garden wall.
Choose two or three flower colors and stick to them so the border does not crowd the text. For a digital card like this one, you can send it the same day you finish the design.
6. Calendar Save the Dates
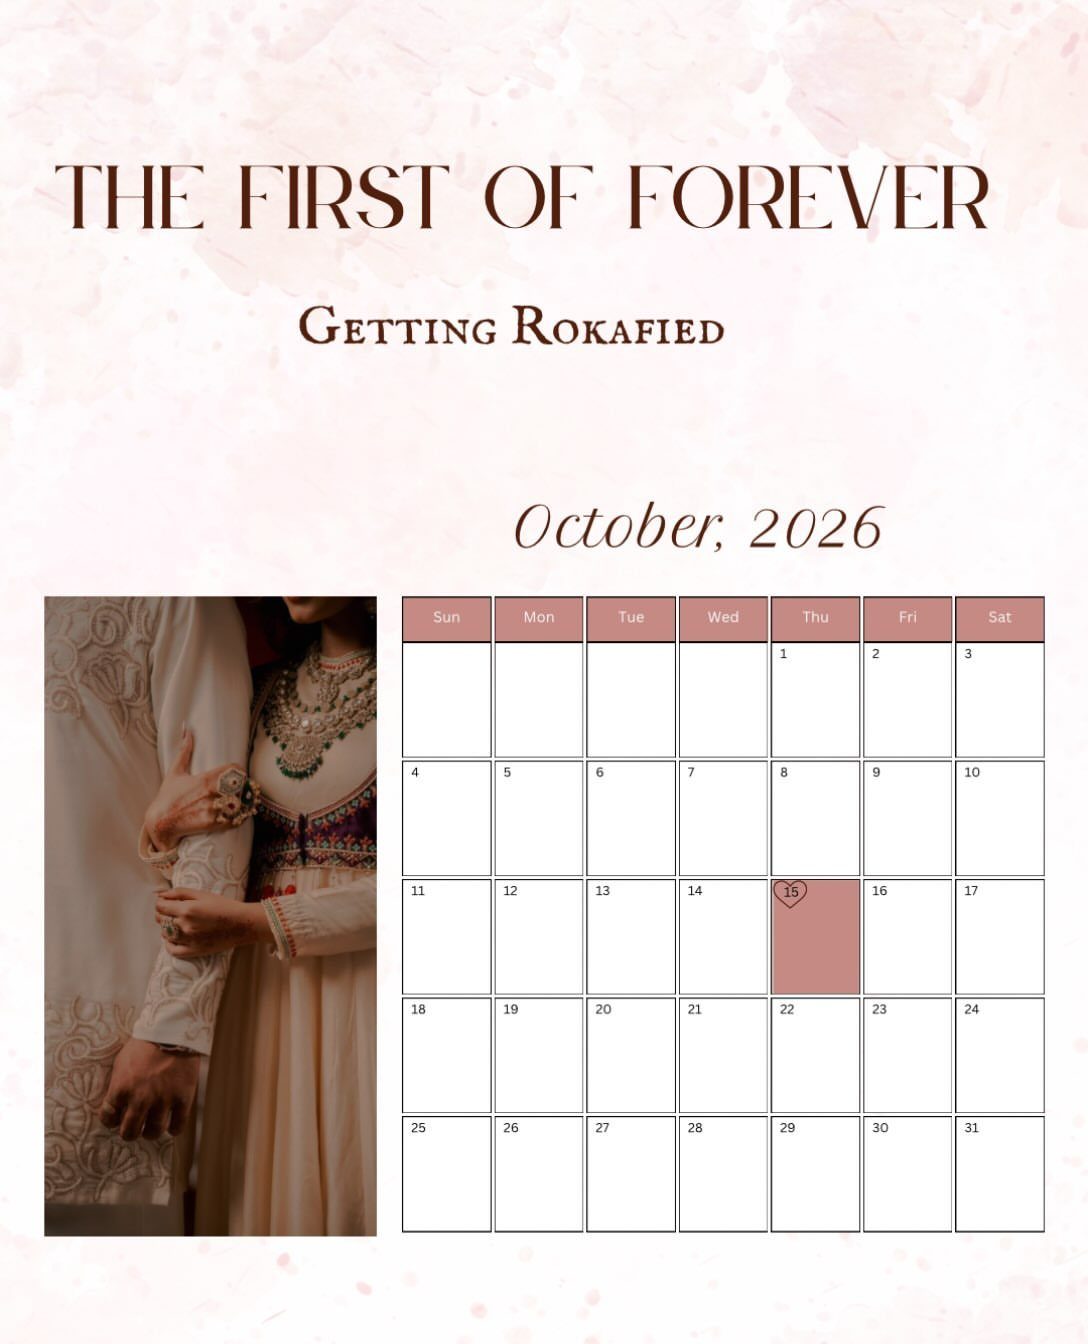
A month grid with one date circled lets guests find the day in about a second. Pair it with a photo, as this card does, and you get personality and information on the same card.
Highlight the date in a bold color so it stands out against the other numbers.
I would also keep the tagline short; a phrase like "The first of forever" adds charm without competing with the calendar, which is the point of the card.
7. Boarding Passes
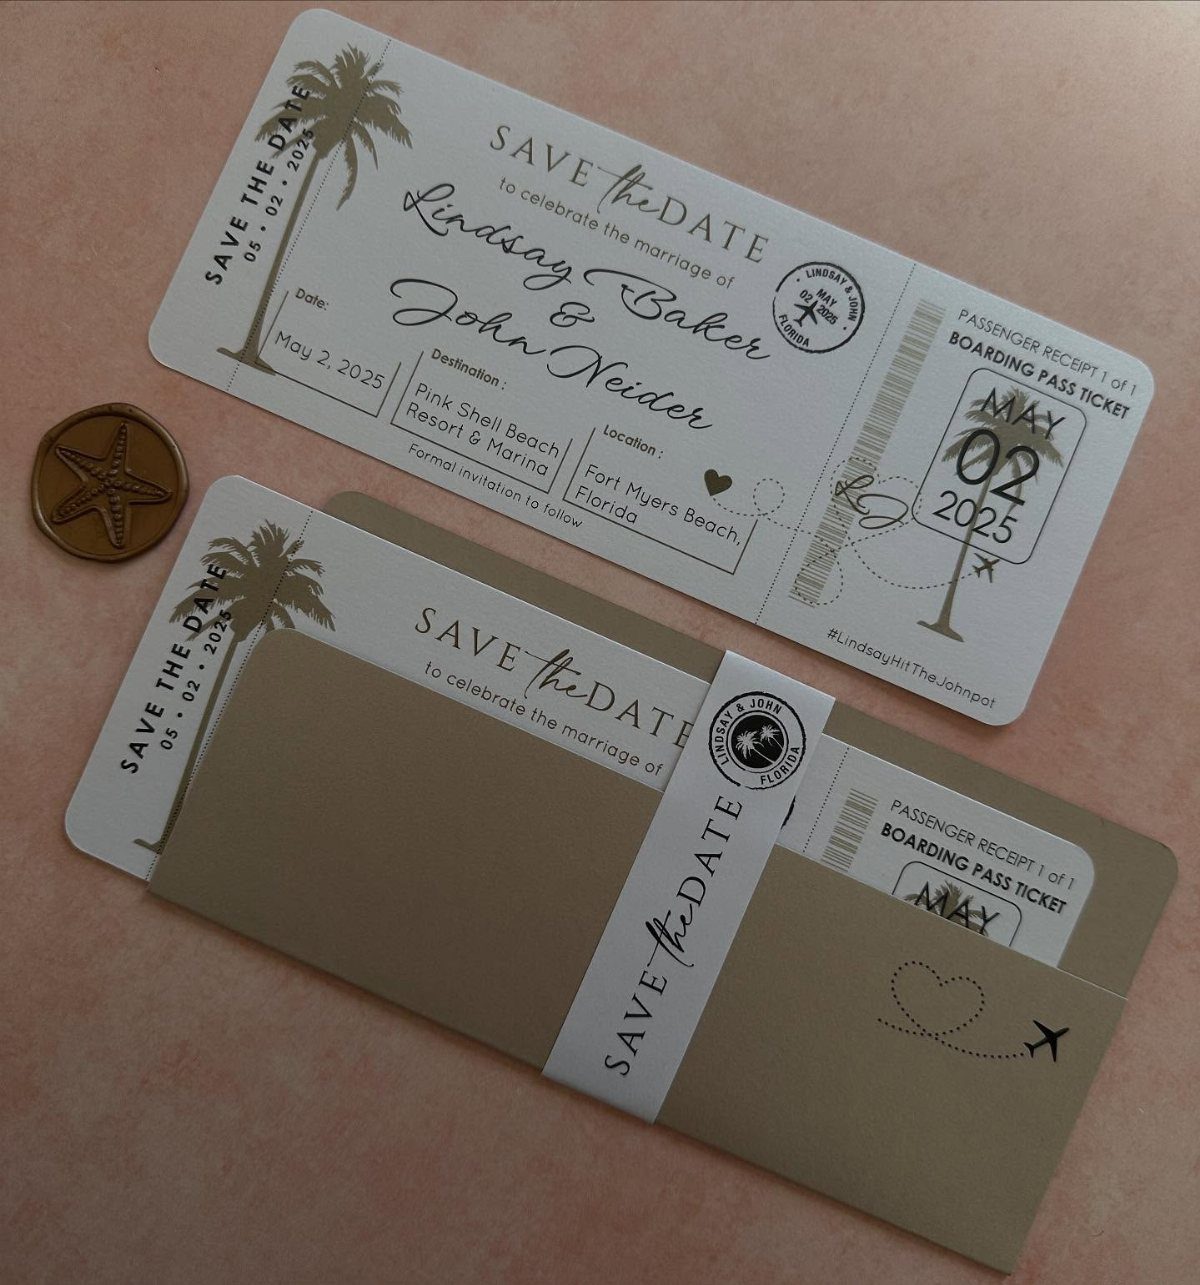
Printing the date, names and destination in boarding pass layout tells guests this is a trip before they open the formal invite. Here the card names Fort Myers Beach, Florida and May 2, so nobody has to guess where to book.
Keep the destination as the biggest line after the names, since that is what guests will search flights for.
A tropical touch like palm trees keeps it light, and a pair of cards on a flat surface photographs well for your own announcement post.
8. Luggage Tags
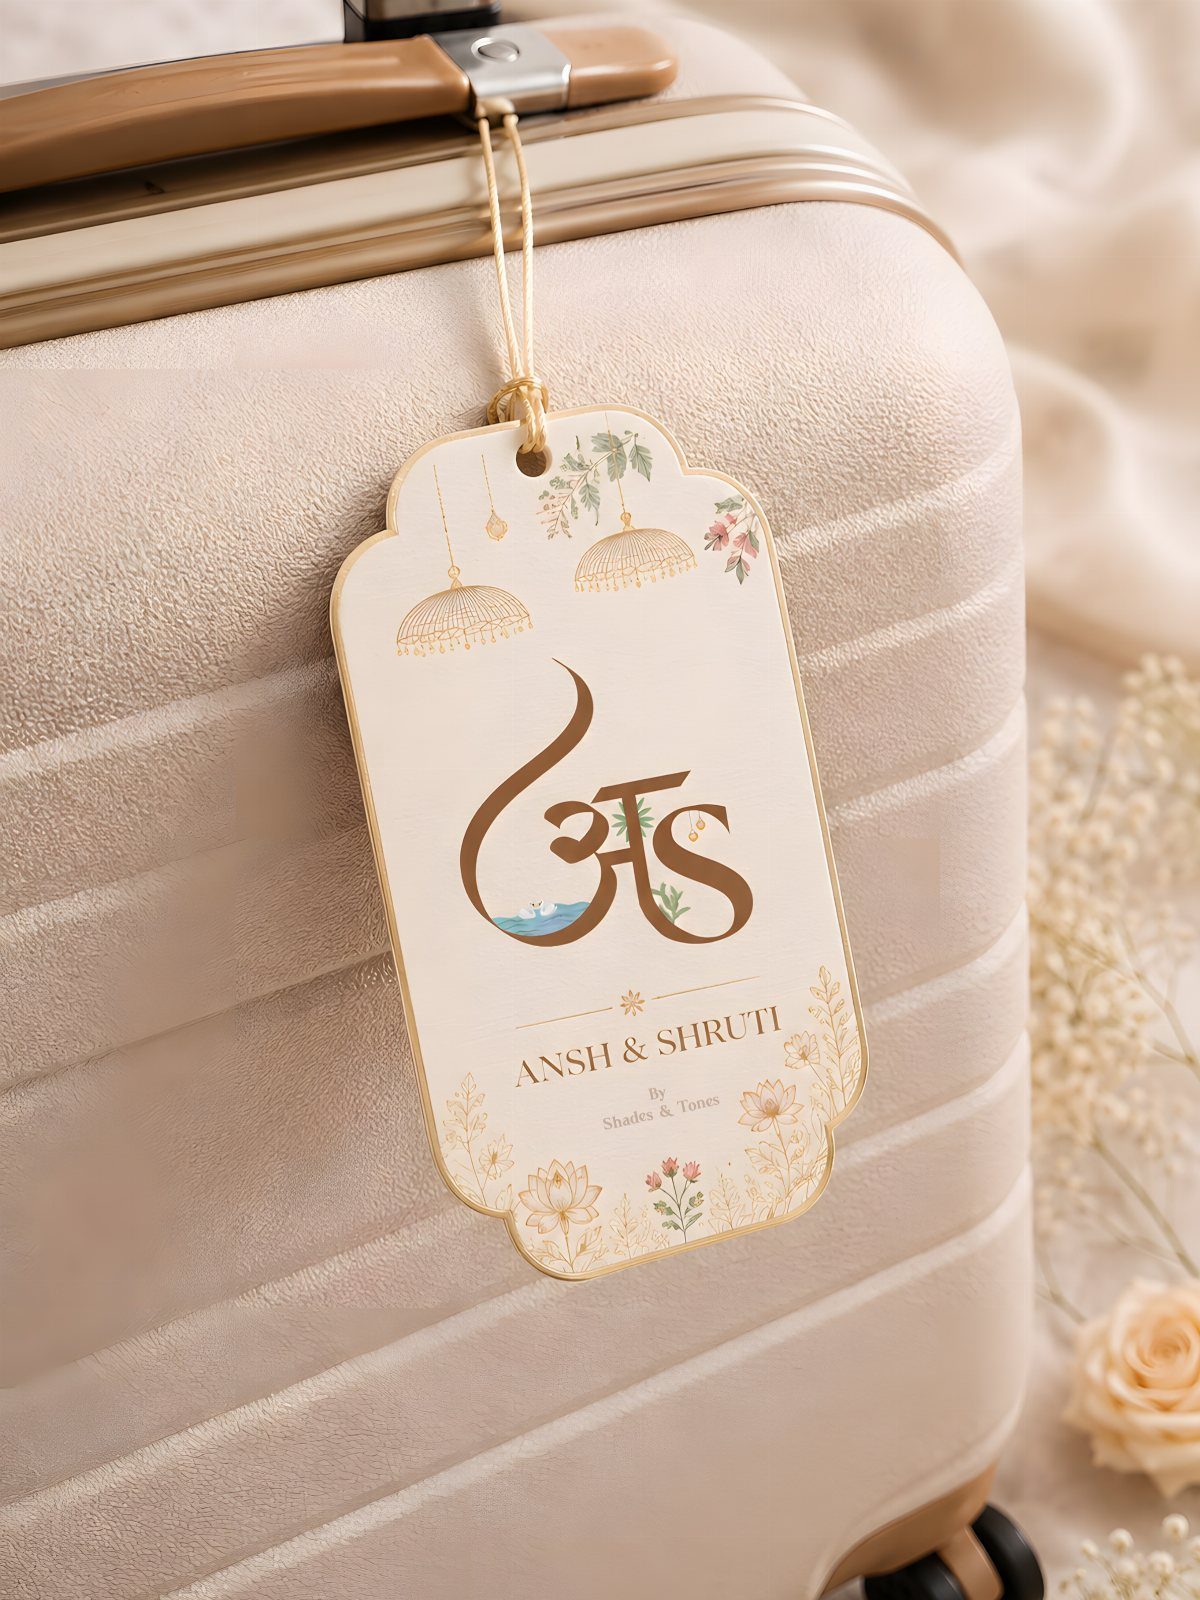
Guests can clip this one to a suitcase, so the save the date rides along with their travel gear instead of sitting in a drawer.
Floral art with both names, as on this tag, suits a destination wedding because the card gets used on the trip itself.
I would pick a tag over a flat card only if you have the time to assemble and mail them, since they cost more to send than paper.
Put the names on the front and keep the date legible, so the tag still works as a reminder.
9. Foil Accents Save the Date
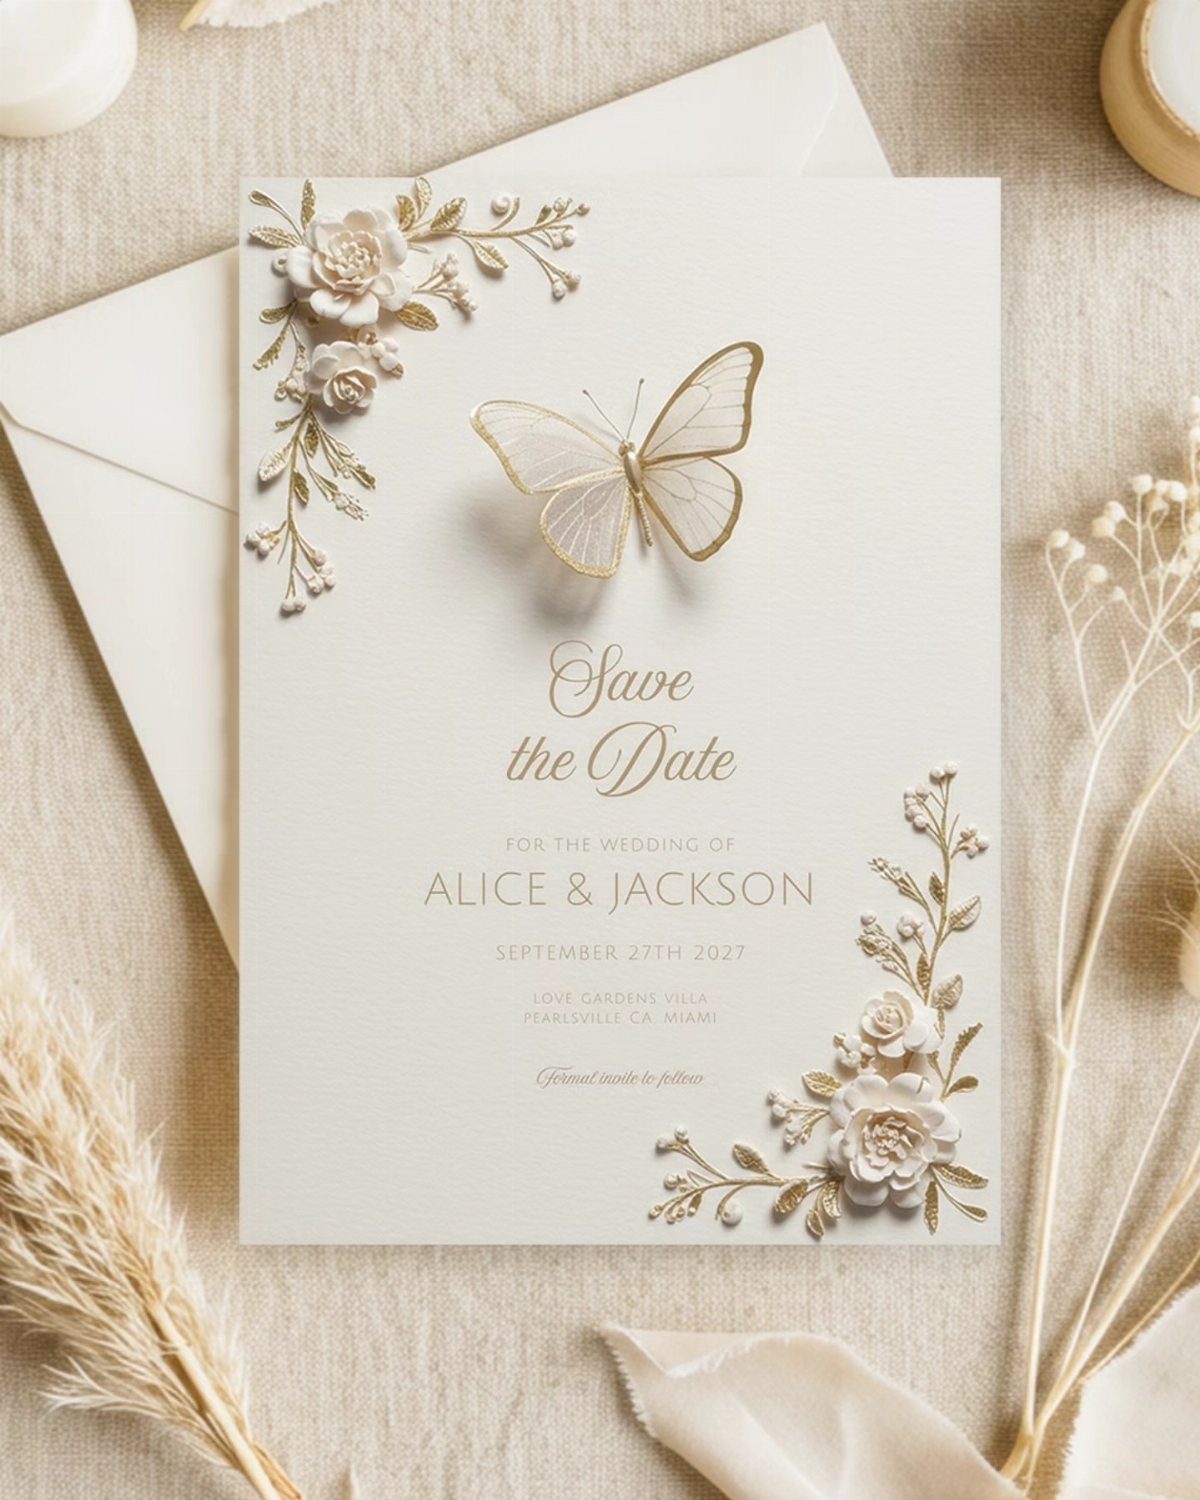
Gold foil on a white card gives the lettering a shine that changes as it catches the light.
On this one, foil leaves and a gold-outlined butterfly sit beside 3D white flowers, so the card feels dimensional before anyone reads it.
Foil costs more than flat printing, and 3D ornaments add weight and postage. I would limit the foil to the lettering and one small motif, then ask your printer how the extra pieces affect mailing.
10. Polaroid Style Save the Date
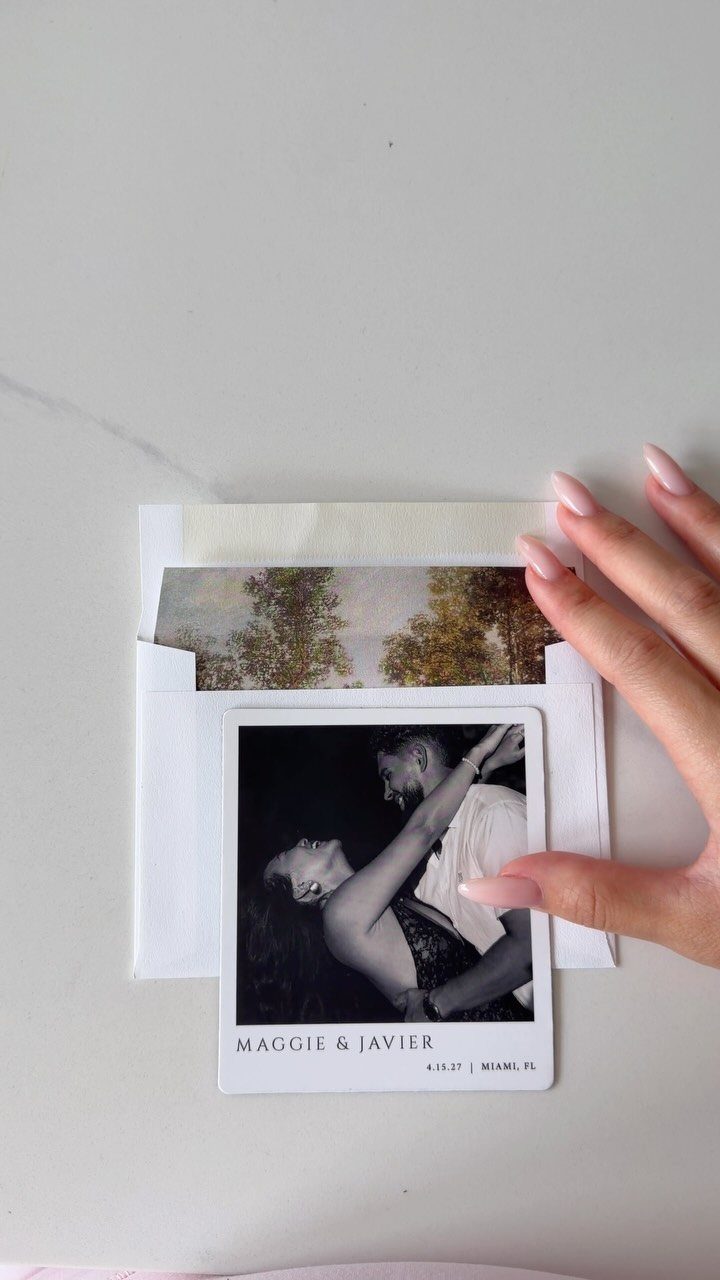
A Polaroid frame makes an engagement photo feel like a keepsake snapped yesterday. Here a black and white embrace sits above a short line with the names, a numeric date and the city, which is all the card needs.
Choose a photo with room around the faces, because the white border crops the image tightly. I like the black and white treatment: it looks timeless and hides any color clash with your palette.
11. QR Code Save the Date
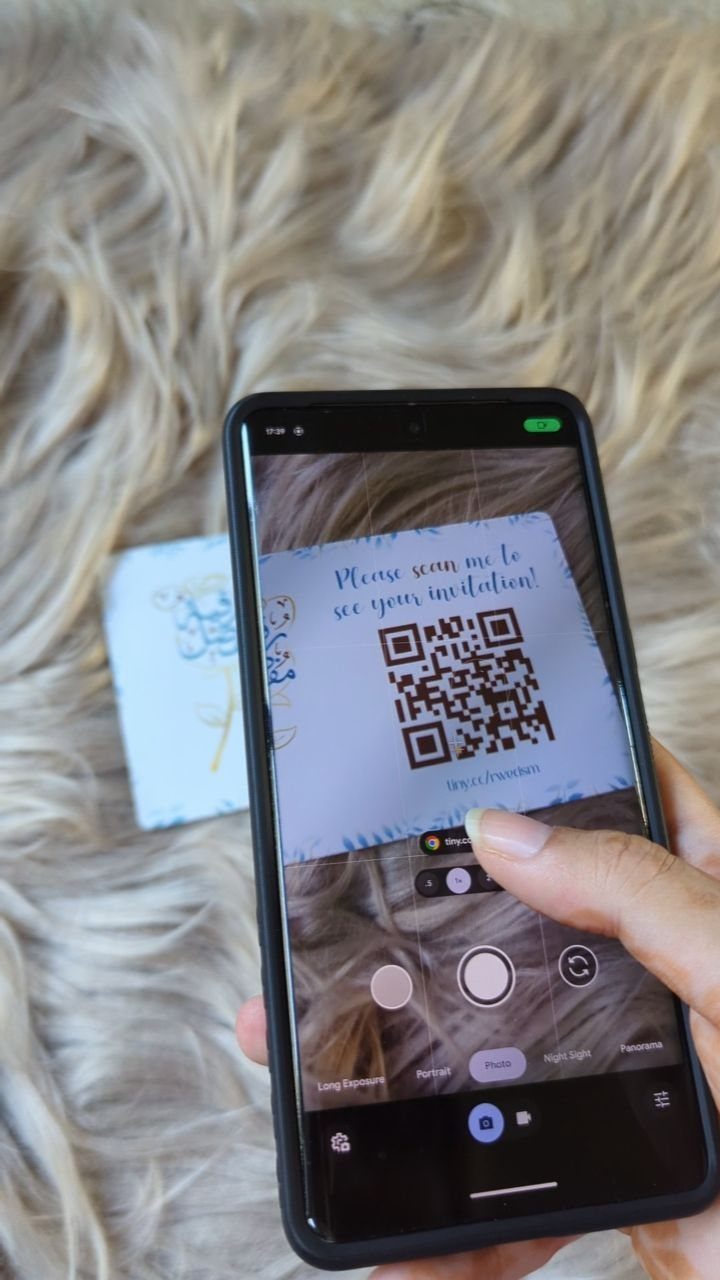
A QR code lets one small card lead to a full wedding site, so the printed piece stays simple.
The line "Please scan me to see your invitation!" is the right kind of instruction, since it tells guests exactly what to do.
Test the code with a few different phones before you print anything. Print it large with plenty of blank space around it, and add the web address in small type for guests who would rather type it.
12. Elegant Script Save the Date
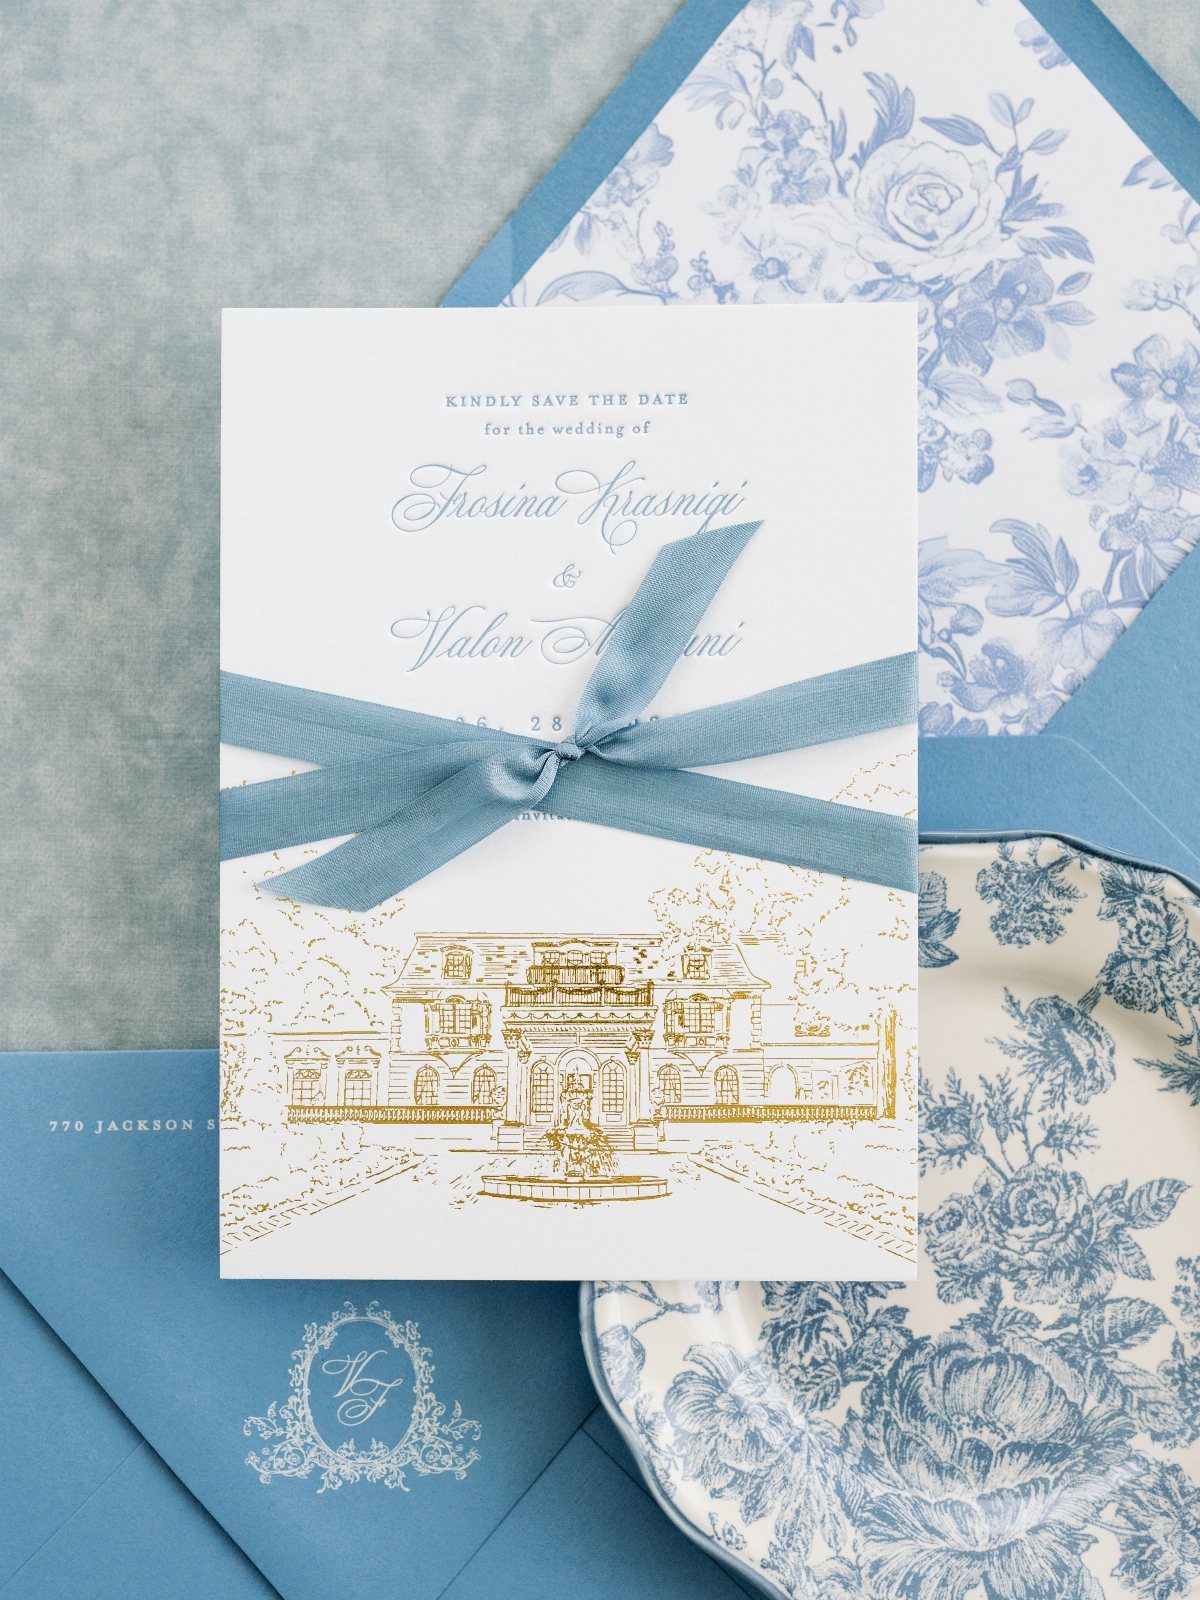
Blue script paired with a gold building illustration reads as classic without feeling stiff. A ribbon tie in matching blue finishes the card, and the blue floral envelopes carry the same palette through the mailing.
Script is lovely but slows reading, so I would set the date in a plainer, clearer style. Stay with 2 colors, as this card does, and the formal look holds together.
13. Vellum Overlay
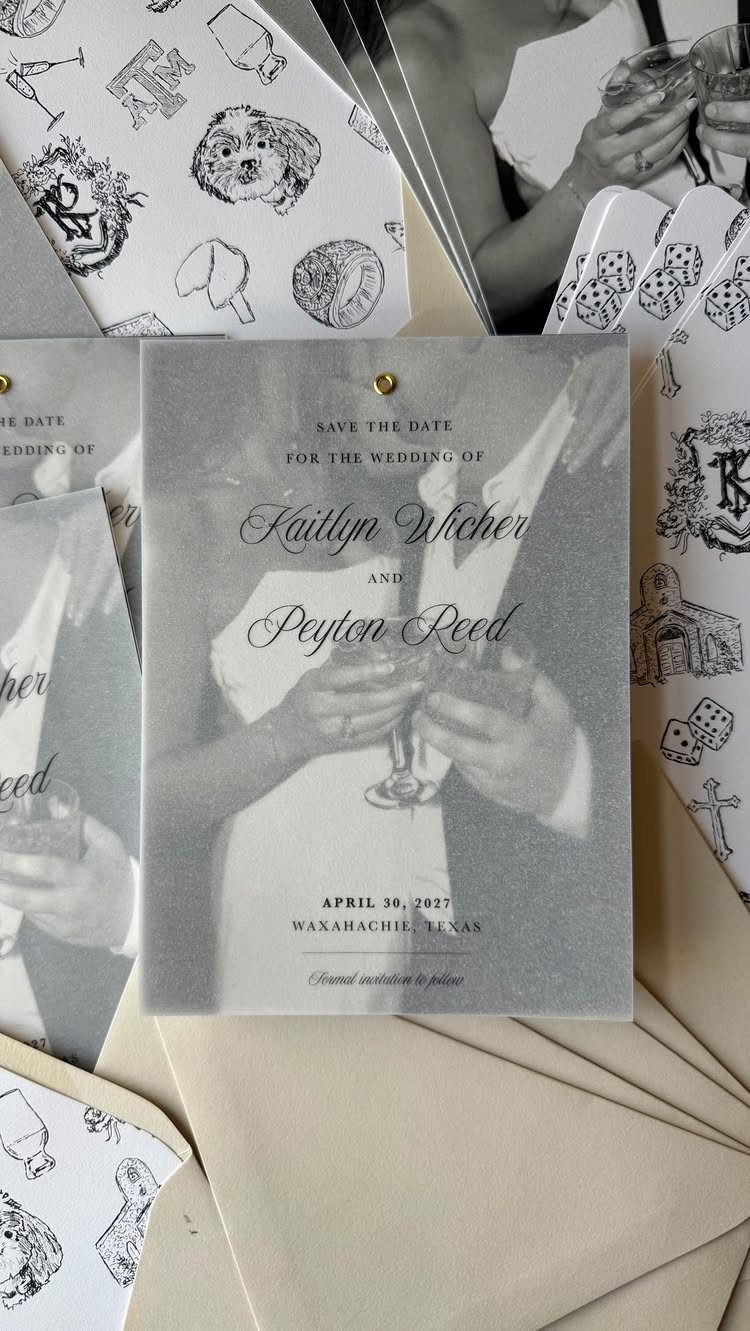
Vellum lays a frosted sheet over the photo, so the faces show through softly and the names sit on top in clean capitals. Black and white photography suits it well, because the translucence mutes tone without fighting a color palette.
Have the printer show you how the overlay sits on the photo before you commit to the full run.
14. Save the Date Coasters
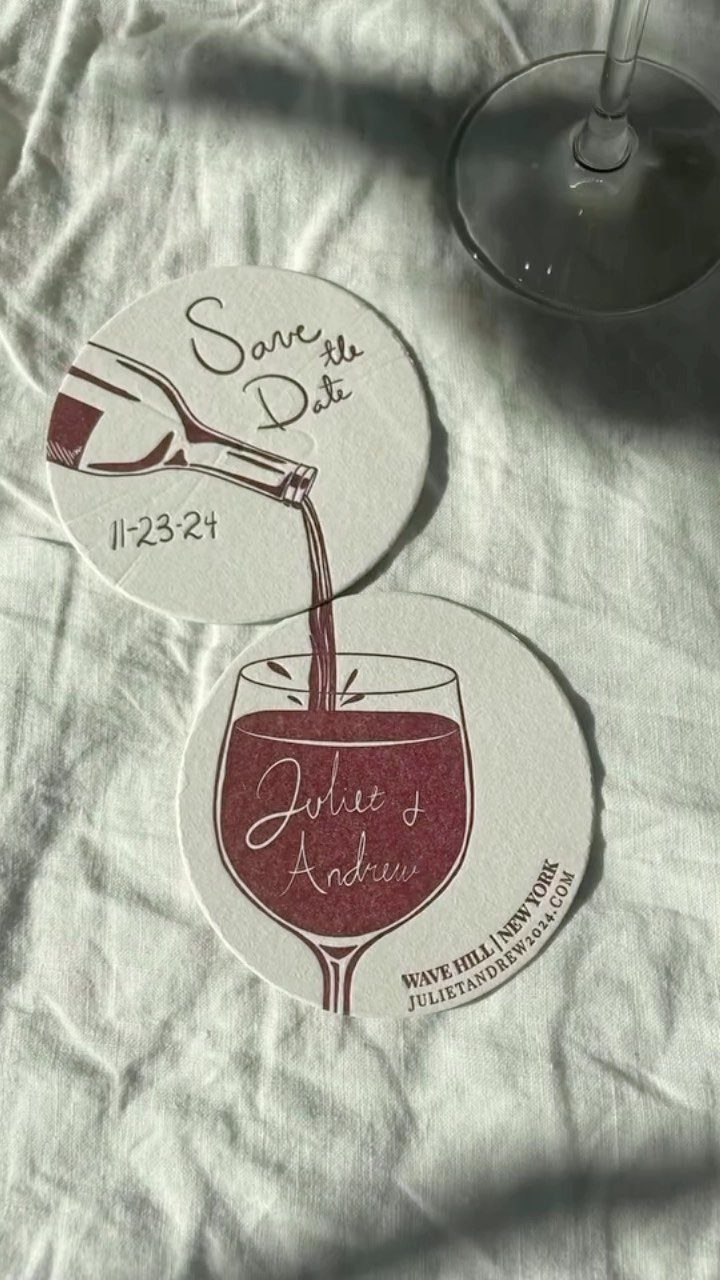
A coaster does a job after the party is over: it sits on a coffee table and keeps the date in view every time someone sets down a drink.
The wine-pour illustration on this pair suits a couple with a wine-country theme, and the date, names and venue all fit on a small circle.
Keep the wording short, since a round surface leaves little room. Make the date the biggest thing on the card, since that single number does the real work.
15. Minimalist Typography
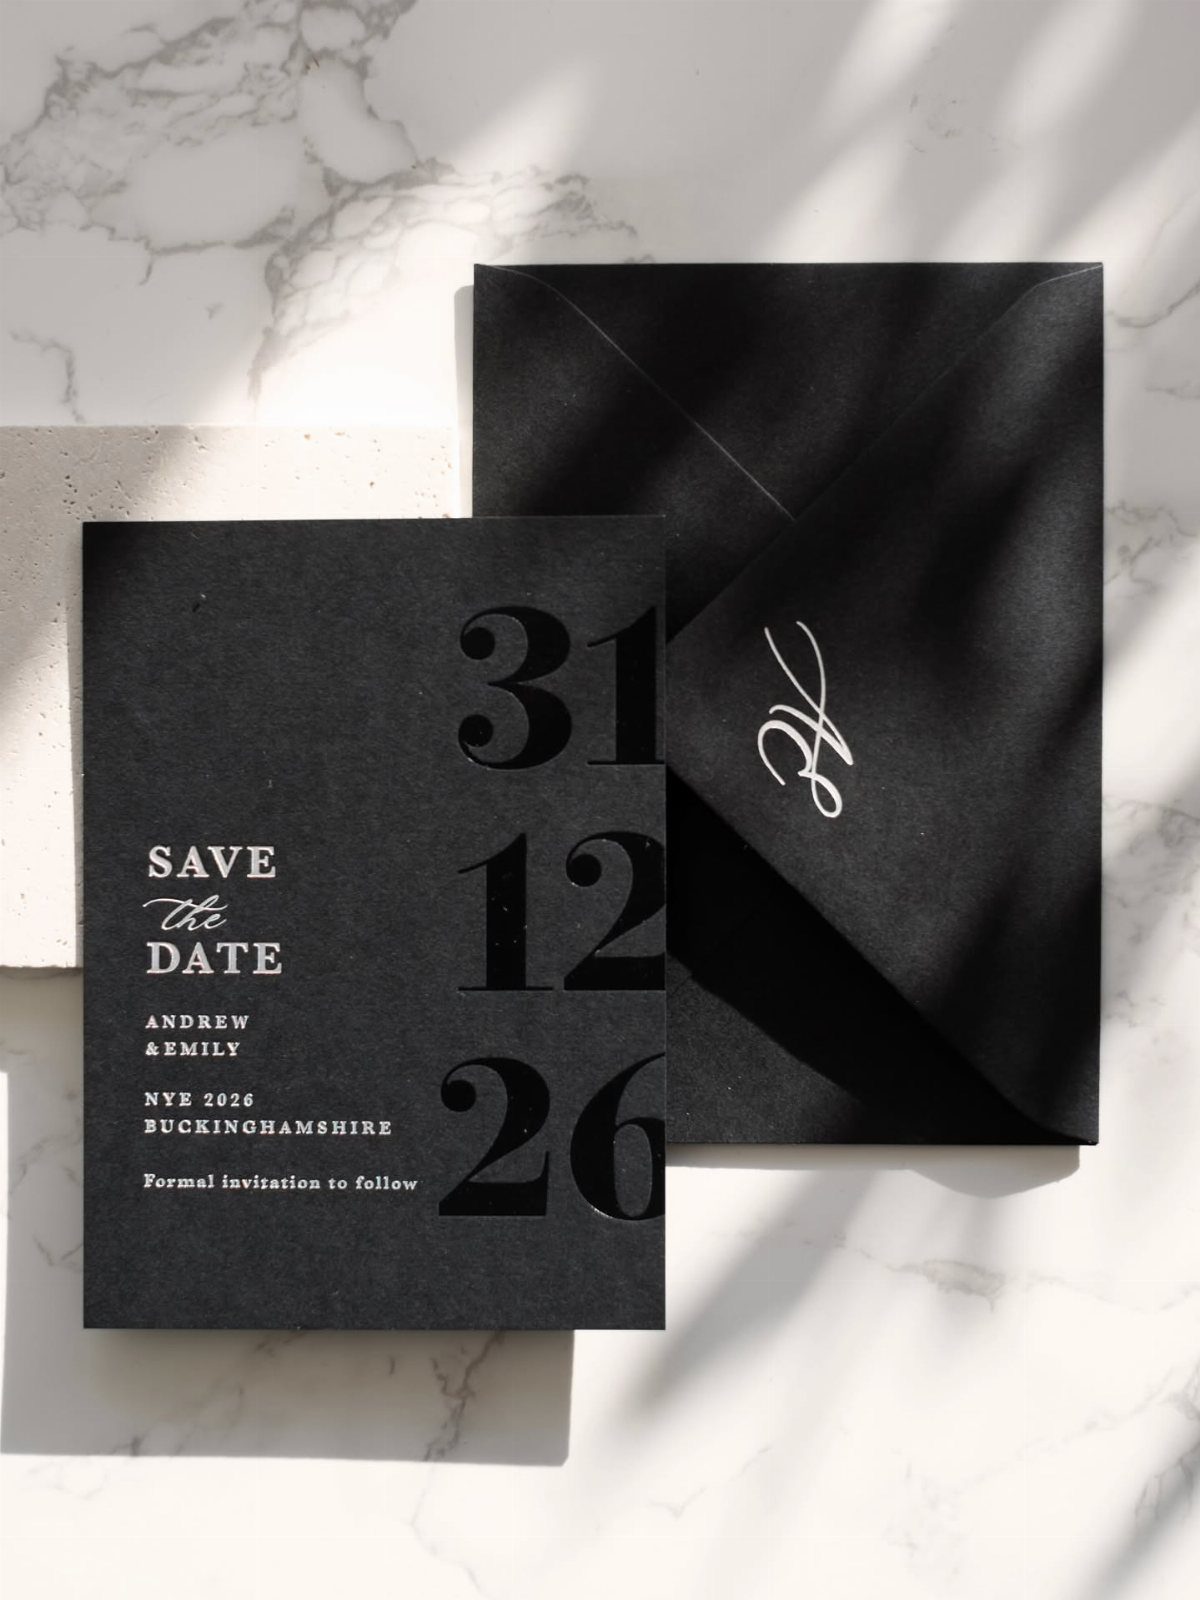
Black stock with white lettering needs no illustration at all. Oversized numerals for the date, here 31 12 26, do the decorating, and a single line for the place keeps the card to what guests need.
Pick one typeface family and vary only the size. Because the ink is white on black, ask your printer for a test sample first, since thin strokes can fade.
16. Wax Seals
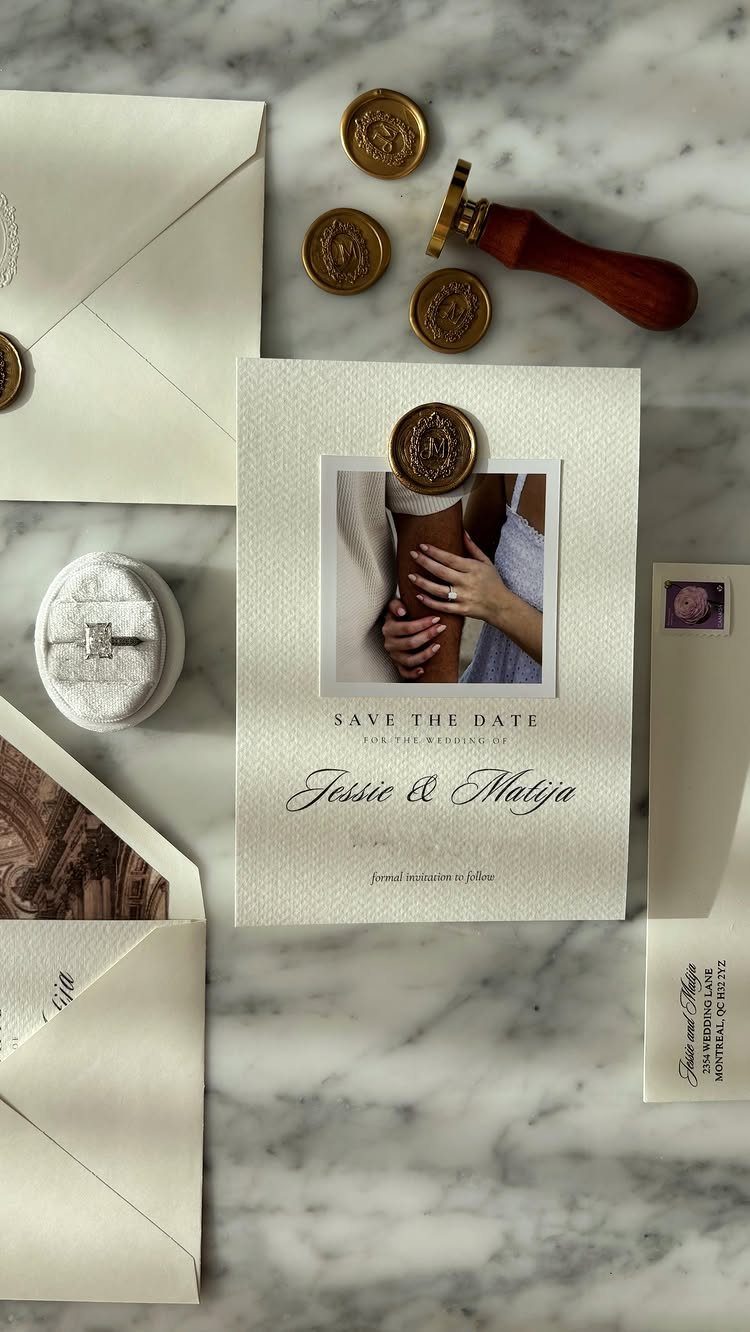
A wax seal on the flap makes guests slow down before they even open the envelope. Gold reads as formal and photographs well against a pale surface like marble.
You can buy a seal stamp and wax and press each one by hand, which suits a small guest list.
Do a few practice seals first, since the wax needs a steady pause to set cleanly. For a long list, I would seal only the envelopes and save your evenings.
17. Seasonal Backdrop
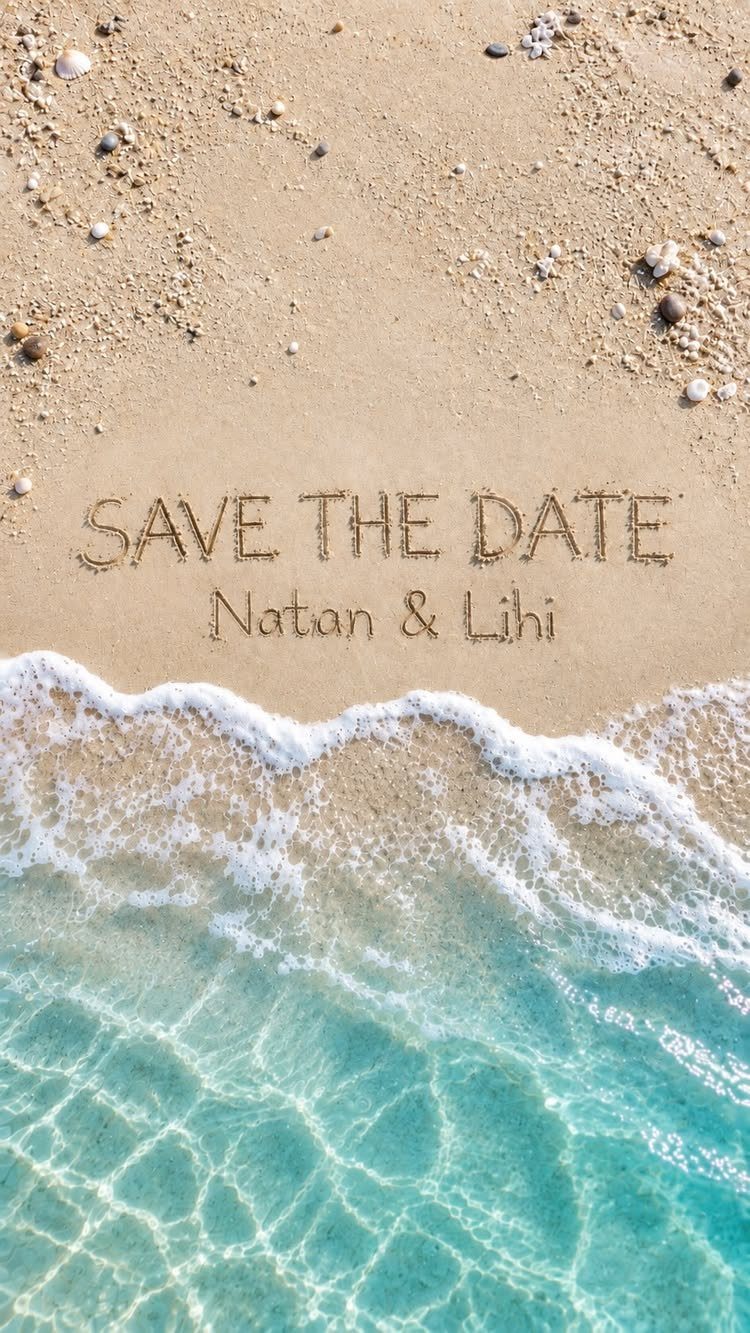
Names written in wet sand, with turquoise water rolling in behind, say summer and shoreline before anyone reads a word. Choose a backdrop that matches your season and setting, then put the lettering right into it.
Cut or paint the letters deep enough that they read clearly when photographed from a few feet back.
A destination or beach wedding gets the most from this, since the picture already tells guests where to pack for. I would shoot at low tide, when the sand is smooth.
18. Handmade Candles
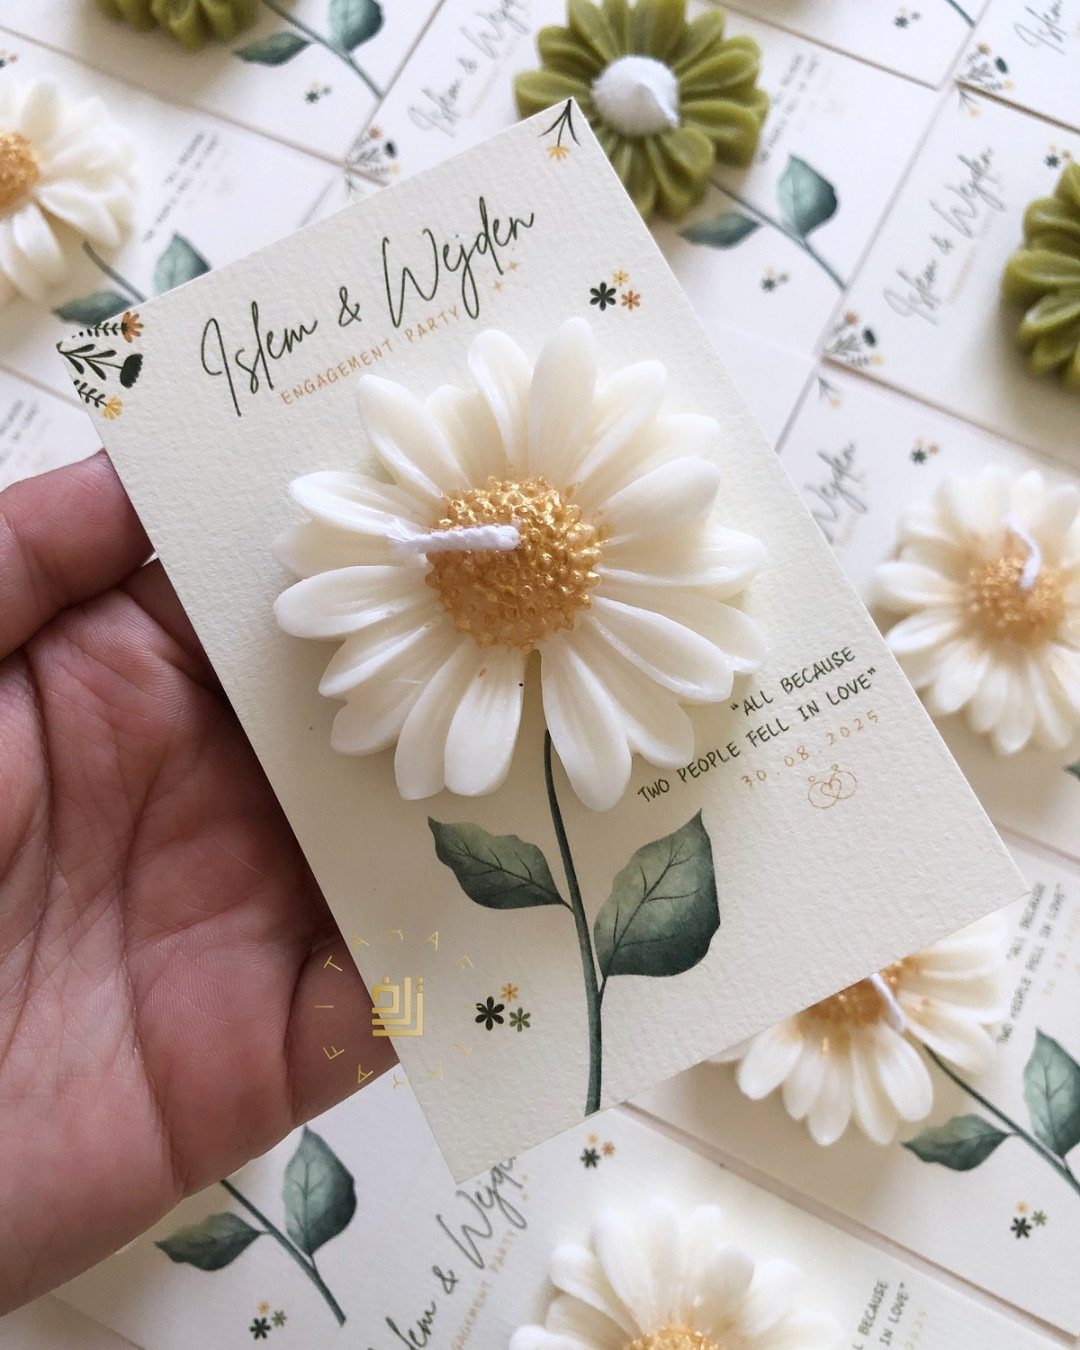
A small candle fixed to the front of the card gives guests something to keep, and a daisy shape feels gentler than a plain votive. The card works as a package: paper to read, candle to burn or display.
Make one first and weigh it in an envelope, because anything with wax adds postage and risks cracking in the mail. I would use sturdy boxes or padded envelopes, and budget for that extra cost.
19. Mirror Reflection Save the Date
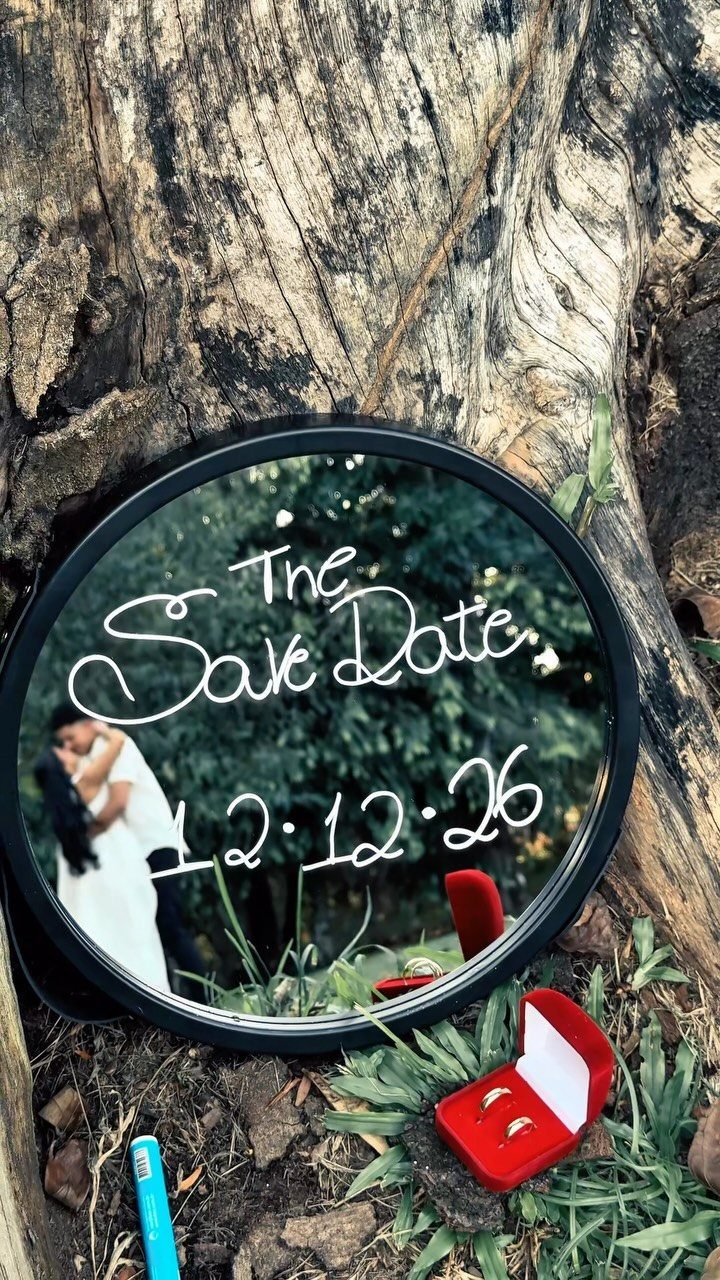
A round mirror propped against a tree turns the scene itself into the card: the couple appears in the glass while the date sits over them in white script.
Because the lettering is white, it reads best against the darker reflection, so frame the shot with shade or foliage behind it.
Keep the wording to the title and the numeric date, as here, so the script stays legible. I would lean the mirror slightly down so the sky does not wash out the text.
20. Engraved Wooden Plaque
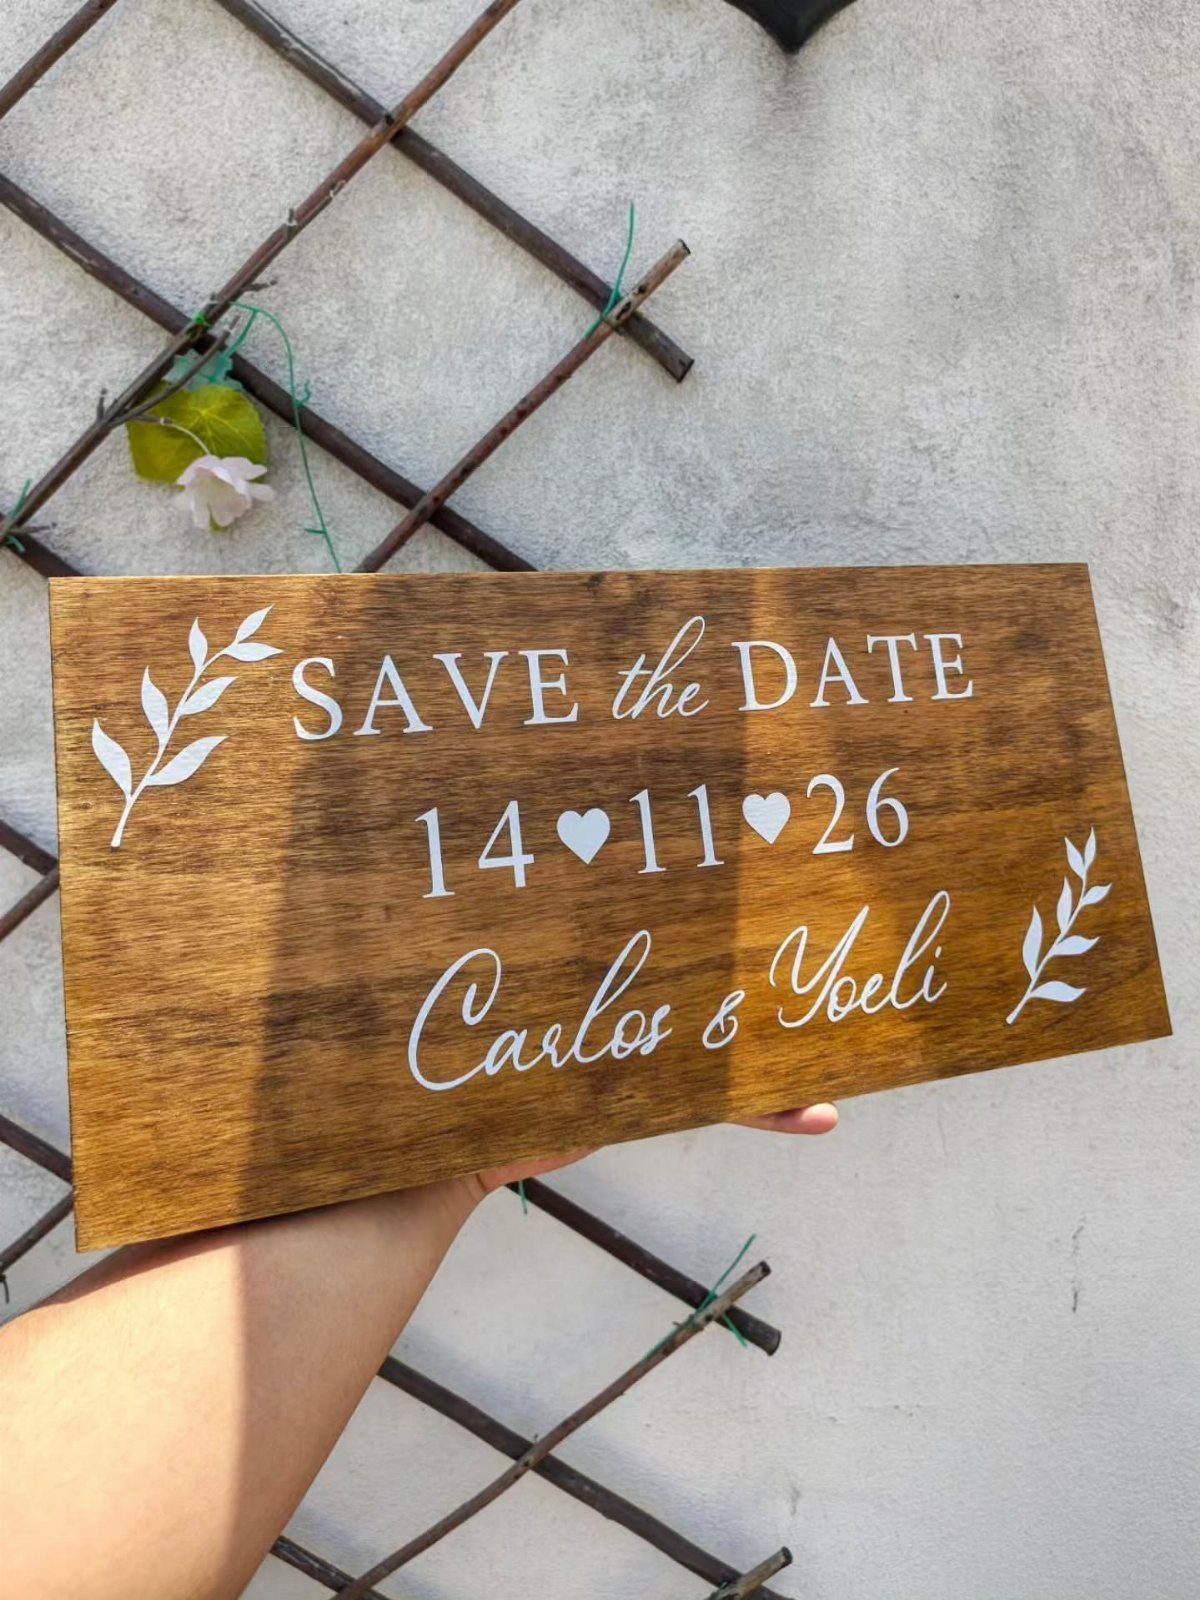
Natural wood with white engraved lettering gives guests a keepsake instead of a card to recycle.
The names and the date sit in the center, with small leaf accents around them, and a hand-held shot against a white wall shows the grain clearly.
Wood costs more than paper to make and mail, so I would send it to a short list, such as parents and the wedding party. Everyone else can get a printed card with the same wording.
21. Ribbon Bow Accent Card
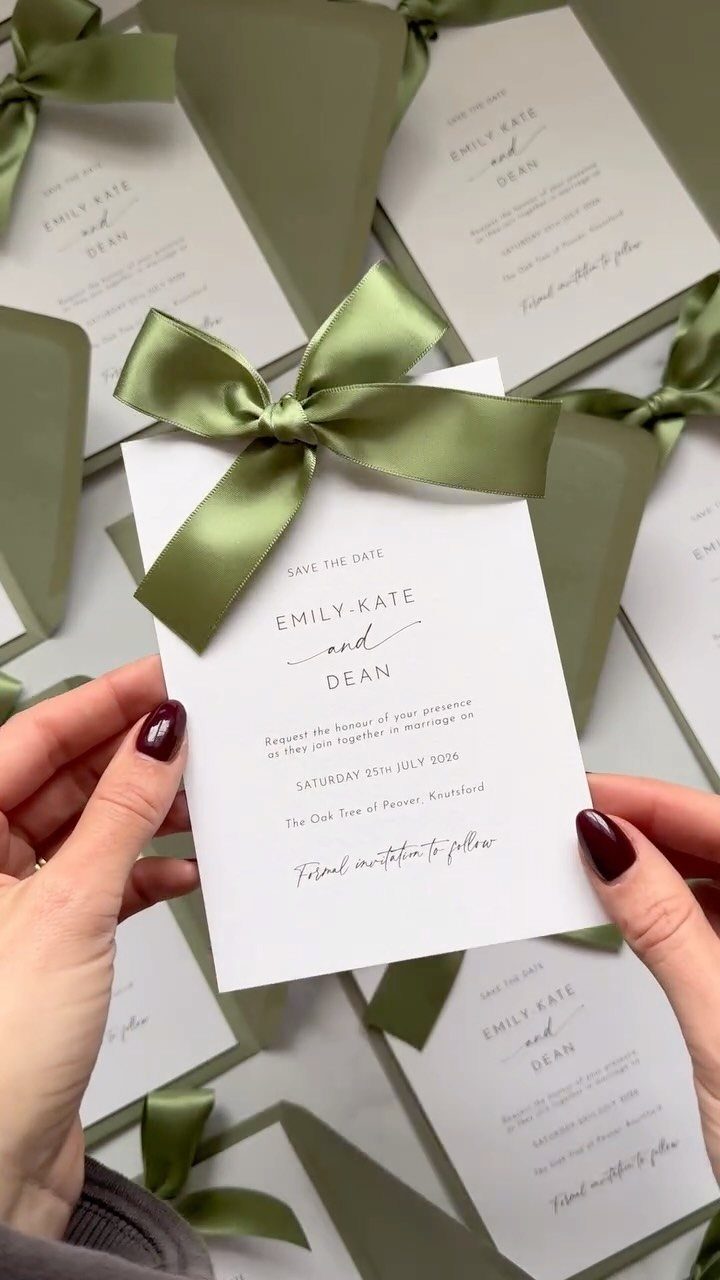
A satin bow is a small touch that makes a plain white card feel like a gift. Green is a good pick if your palette leans botanical, and matching envelopes carry the color into the mailbox.
Tie the bows by hand and keep them flat, because a puffy bow adds postage and can crush in transit. Make one first and time it, since 50 of them will eat an evening.
22. Retro TV Display
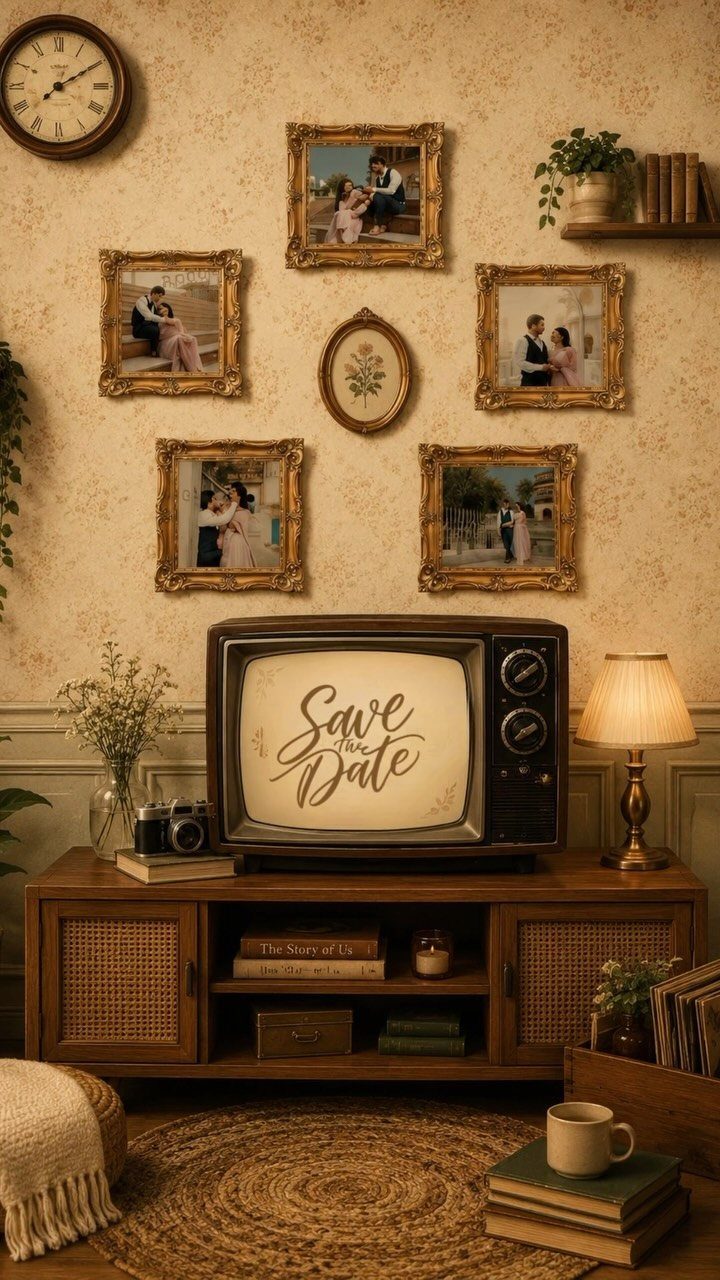
A vintage television playing the words "Save the Date" gives you a ready-made scene for a photo or short video announcement.
Frame it in a room full of retro pieces, like a lamp, a clock and framed photos of the two of you, so the whole shot has one era.
This works best as a digital post, which costs nothing to send. I would film it in steady light so the screen text stays readable.
23. Embossed Card in Vintage Typewriter
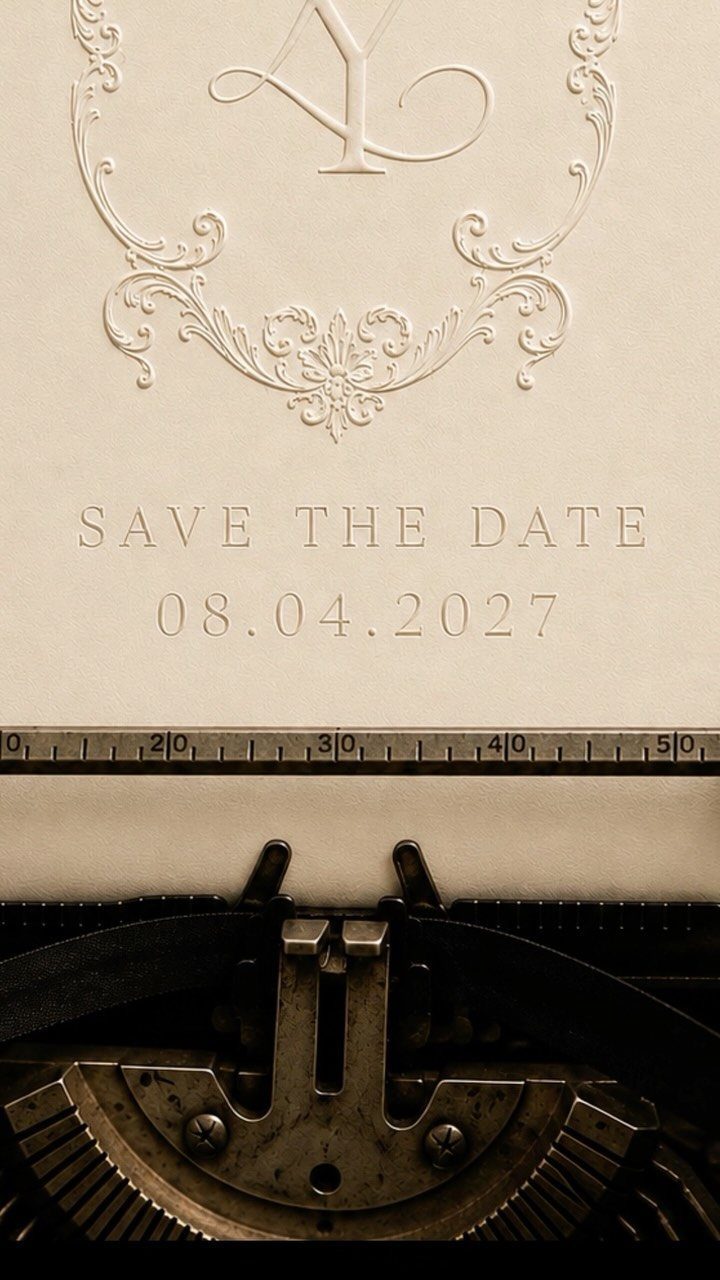
Loading an embossed card straight into a typewriter makes the raised crest and lettering look like it was typed on the spot. Cream stock with a plain numeric date, here 08.04.2027, lets the texture do the decorating.
Shoot close and use side light, since shadows are what make embossing show on camera. I would ask your printer for a sample before ordering, because emboss costs more than flat print.
24. Dog Bandana Save the Date
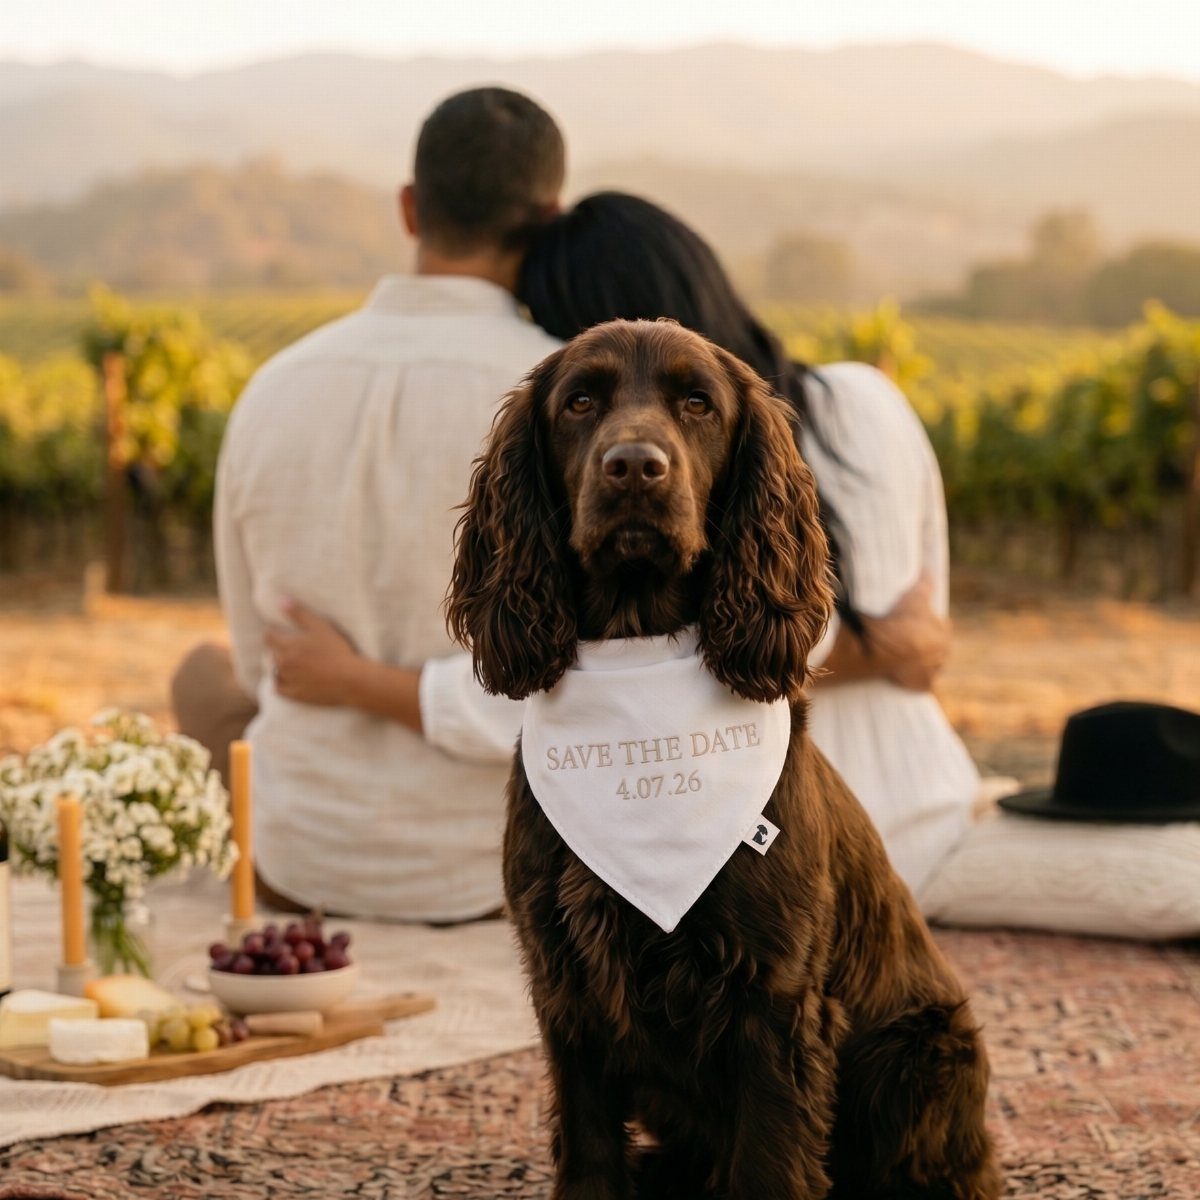
Your dog can be the messenger: a white bandana printed with "SAVE THE DATE" and the numeric date puts the news on the one family member everyone wants to look at.
It suits couples whose pet is already part of the story.
Order the bandana early and check the fit before the photo session. I would pose the dog first, while treats still work, then add the two of you.
25. Clear Acrylic Save the Date
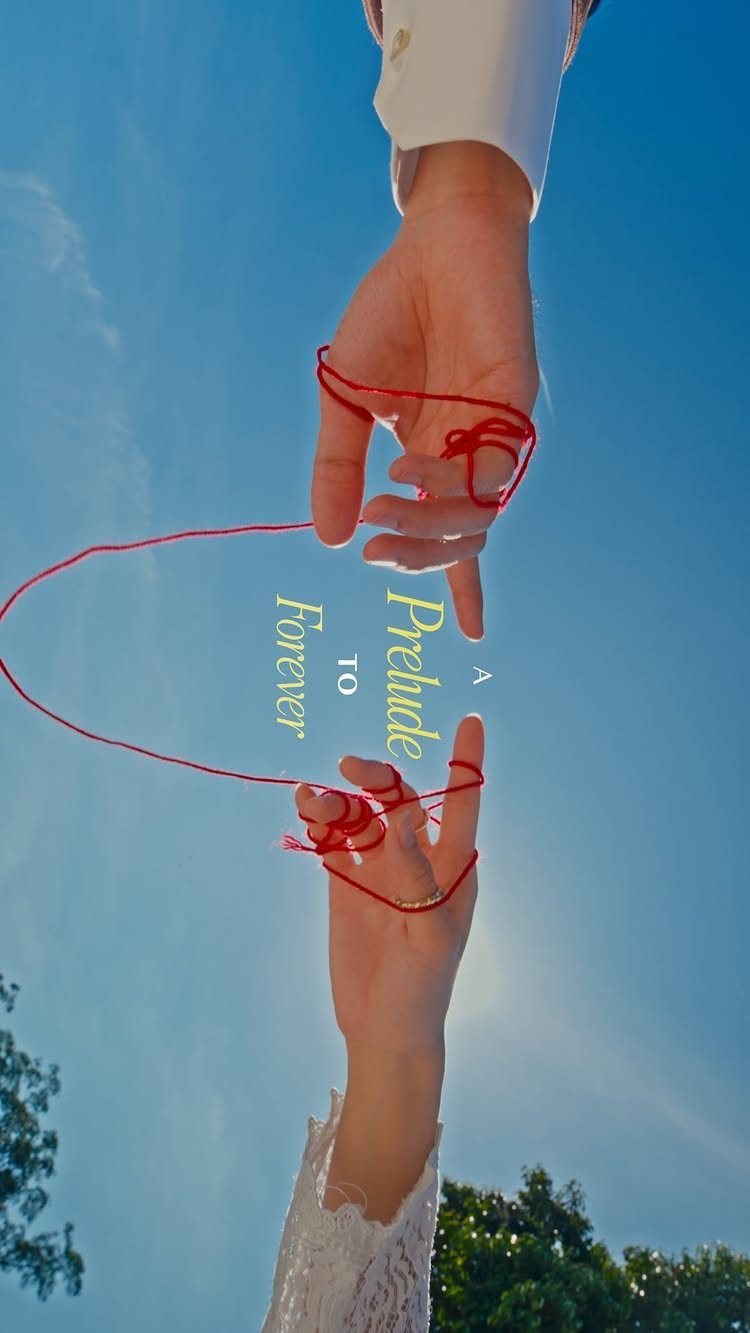
Clear acrylic lets the sky show through the card, so the white text seems to float. A ribbon or string in a strong color pulls focus to the text on clear acrylic.
Keep the wording to a line or two, since white print on a clear surface has nothing behind it to help.
I would hold a sample against a bright background and a dark one before ordering, then pick the setting where the letters read best.
26. Digital Tablet Save the Date
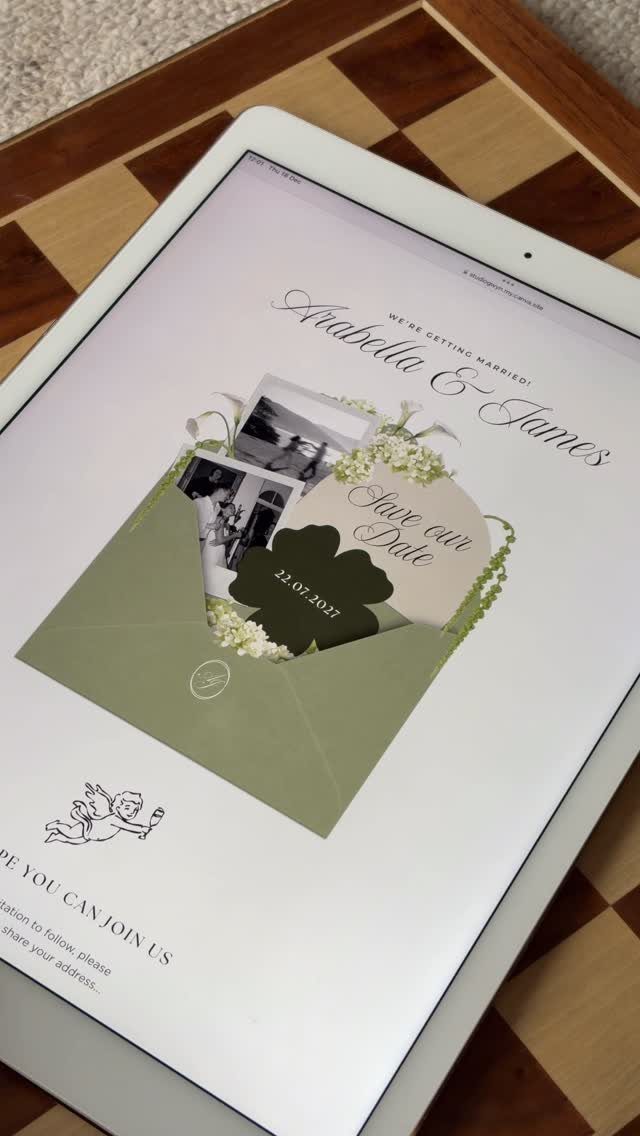
A tablet screen shows the card the instant someone opens the message, and nothing needs printing or mailing.
Arabella and James’s version pairs floral graphics with an envelope image and a date written 22.07.2027, so the card reads as a mailed invite even on a screen.
Photograph the screen at full brightness to cut glare. I would add a plain-text copy of the date in the message itself, since images do not always load for every guest.
27. Deckle-Edged Paper Card
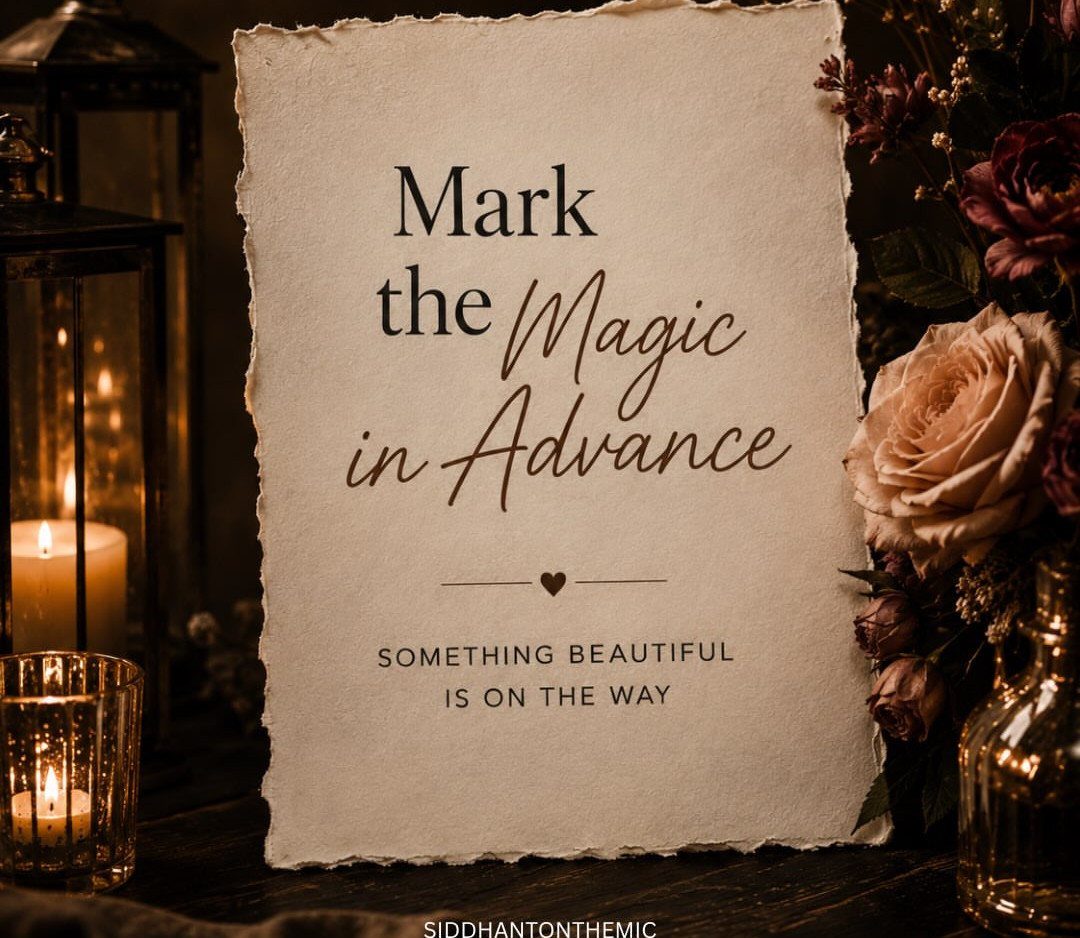
Rough, feathered edges make a card look torn by hand from a larger sheet, which is the whole charm of deckle. Deckle edges soften script fonts and give them room to breathe.
Ask your printer for a deckle-edged sample before you order, since I would want to feel the paper first. If you photograph the card for social media, set it against flowers or candles rather than a bare surface.
When to Send Save the Dates
For guests within a few hours’ drive, 4–8 months out gives them time to clear the date without feeling rushed. For a destination wedding, start earlier, 8–12 months out, because guests need time to book flights and request days off.
If you land between those windows, lean toward the earlier end. A guest can always wait for the invitation, but nobody can add months to their own planning.
Lock your guest list before anything goes in the mail.
Everyone on it gets a card, including your parents and wedding party. Even people you have already told in person should get a formal one, and a formal invitation after it.
Send save the dates about 6 to 8 months before your wedding. For destination weddings or celebrations requiring travel, send them 8 to 12 months in advance so guests have time to plan.
What to Include in Save the Dates
Every save the date needs your names, the wedding date, the location (city and state), and a line telling people the real invitation is coming. Anything beyond that is optional.
Give the date the most room and keep it out of fancy lettering. Guests need it more than anything else on the card, so make it easy to read.
Tone can shift the wording. A traditional card might read "Please save the date for the wedding celebration of" followed by the names, while a casual one can say "are getting married" with a date like 06.15.26 and "Details to come."
One personal line is fine if it sounds like you. Digital cards can include a website link or hotel block details right on the card for the planners who book flights the day they get word.
Digital Vs. Print Save the Dates
For a big guest list or a tight timeline, I would go digital. Email or text costs little, saves paper, and lets you add a clickable link, which beats asking guests to type a web address correctly.
Print wins when you want guests to keep something in hand. It costs more in printing and postage, so it suits a shorter list better.
You can also combine them.
If you’re mixing formats, send digital save the dates early and print the formal invitations 6–8 weeks before the wedding. Guests who prefer electronic messages get what they like, and your closest people still get something to hold.
Frequently Asked Questions
What do you put on a save the date for a wedding?
Put your names, the wedding date, the city and state, and a line saying the formal invitation is coming.
Make the date the biggest thing on the card and set it in plain type, because a guest who can’t read it quickly has missed the whole purpose.
A website link or one personal line is a fine extra, but nothing more is required.
What can be used instead of “save the date”?
A digital message sent by email or text is the easiest swap, and it can carry a clickable link. Other options include a photo card, a luggage tag, a coaster or a wooden plaque.
Should I do save the dates and wedding invitations?
Yes, send both. An early card lets guests hold the day and shop for flights, while the invitation itself can wait until about 6–8 weeks out.
Mail a card to every person on the final list, parents and wedding party included, even if they heard the news from you face to face.